We review products independently. When you buy through links on our site, we may earn a commission to help support our testing. Learn more.
We’ll go over how to tune your 1911 sear angles and sear spring to reach a crisp 3-4 lb trigger pull.
Or, you’ll end up deciding to have a competent gunsmith do your trigger job.
Either way, you’ll learn more about how your 1911 functions and why it can have the best trigger out there. Please see our disclaimer since this can potentially damage your gun and/or cause injury.
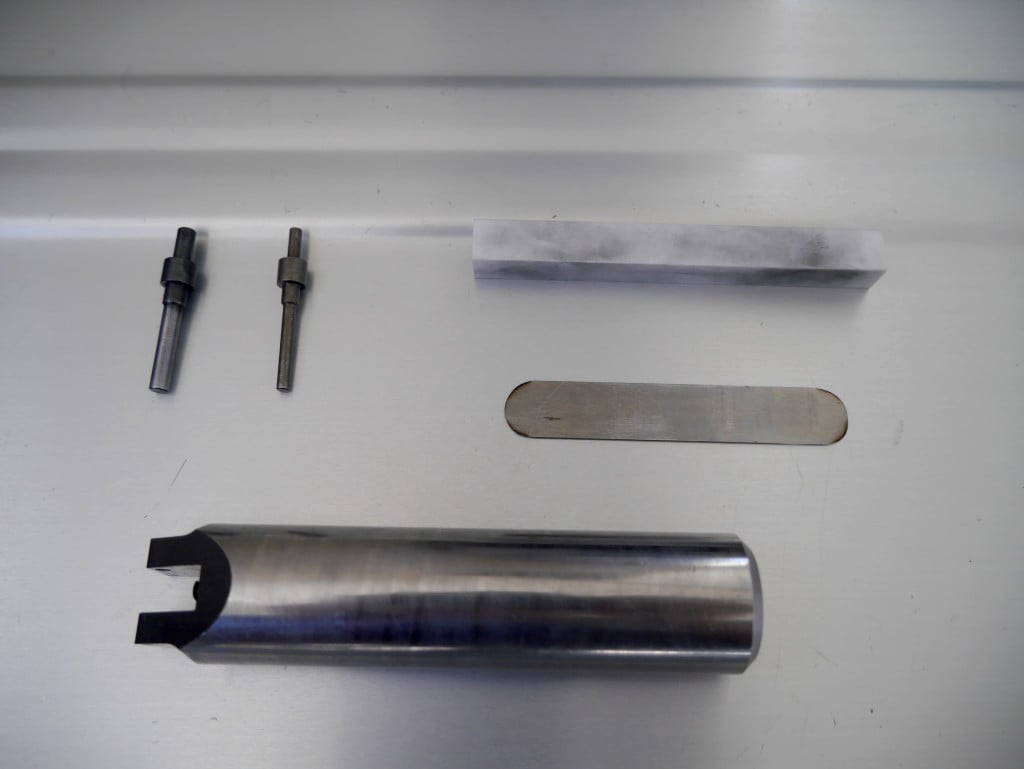
1911 Sear Jig
Trigger Job Essentials
Reference Materials
This is a quick overview of a 1911 trigger job. We’ve done our research through the gold standard in manuals and videos. We thoroughly suggest picking them up if you want to learn more about the 1911.
3M 1000 Grit Sandpaper ($10): Fine sandpaper for fitting in trigger adjustment pins or polishing other 1911 parts. Good to have around.
Keep in mind a professional trigger job is around $75-100 so if you only plan on doing one trigger job, it might be more economical to just bring it into your local gun store.
You can also try out our other article to lower your trigger pull up to 1 lb with just polishing compound and a Dremel tool.
Trigger Job Parts
Light Sear Spring($8): Get at least two since you might mess the first one up.
Light Mainspring ($4): The factory weight for .45 ACP 1911’s is 23 lb but you can go down to 20 for normal loads and even 18 for light loads. For 9mm, I’ve gone down to 17 lb for normal loads and 15 lbs for light competition loads.
The 1911 Trigger Job
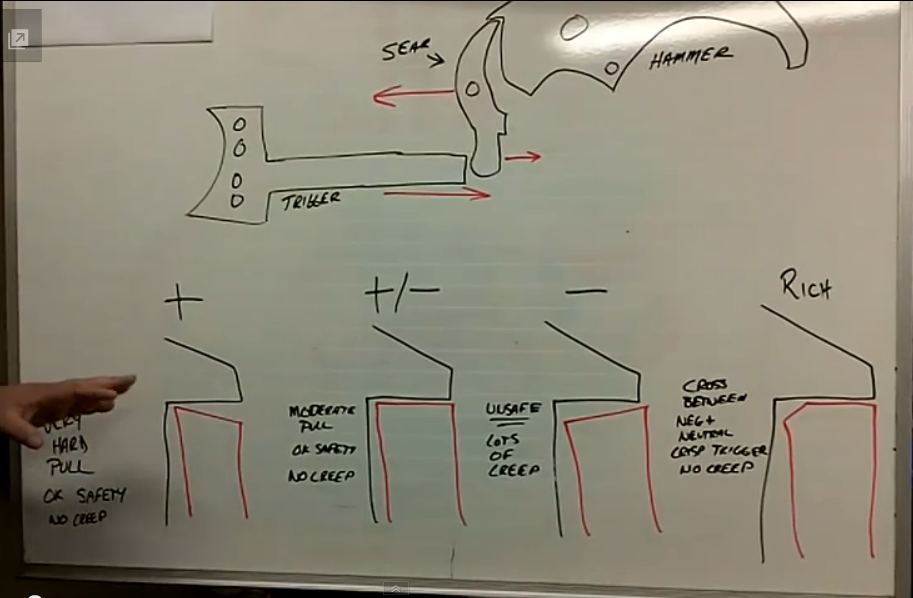
Here’s a screen capture from the YouTube video we’ll watch later. It gives a good idea of how the trigger, sear and hammer interact. We want our sear and hammer to look like the bottom right.
GTT Trigger Job Screenshot
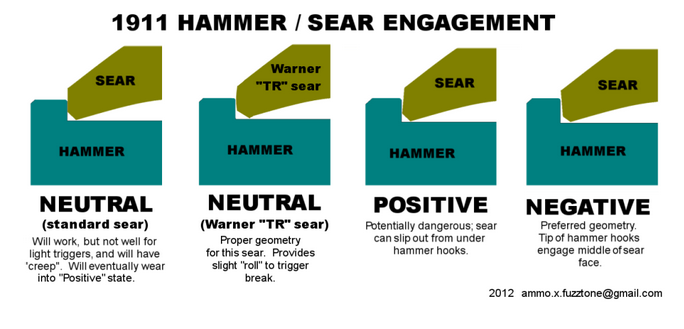
Update: The above is simplified a little since on the models of guns I’ve seen, there’s always some “extra” sear that spills over the hammer segment. This set of pictures is more realistic in my opinion.
1911 Hammer Sear Engagement
Primary Sear Angle
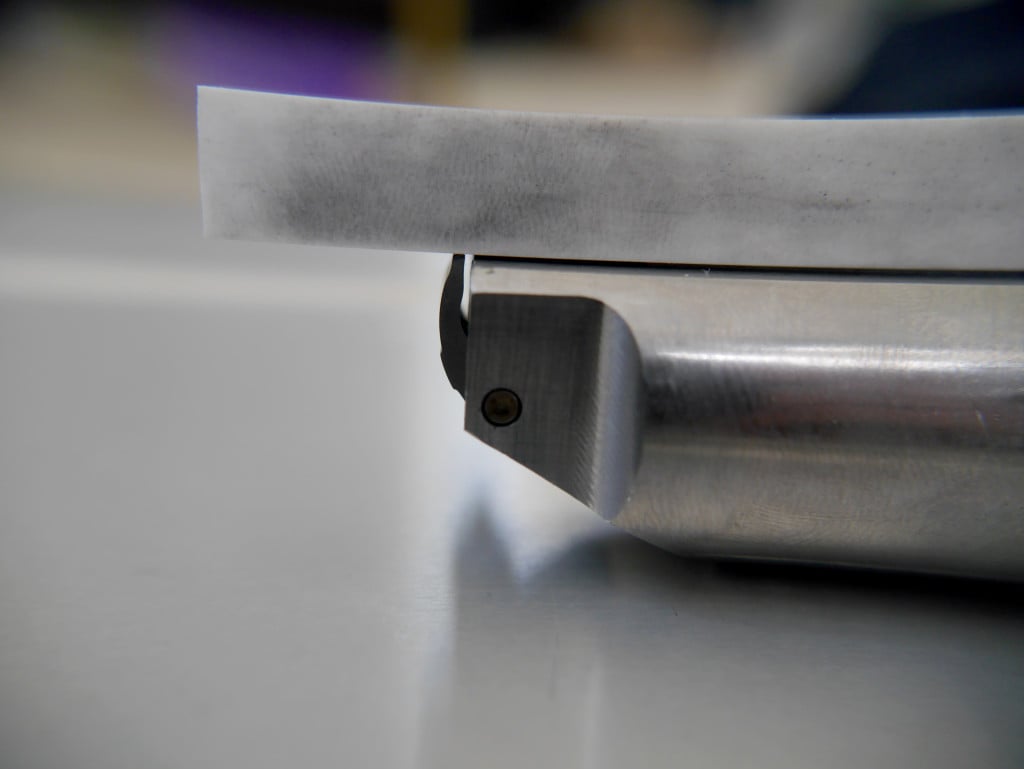
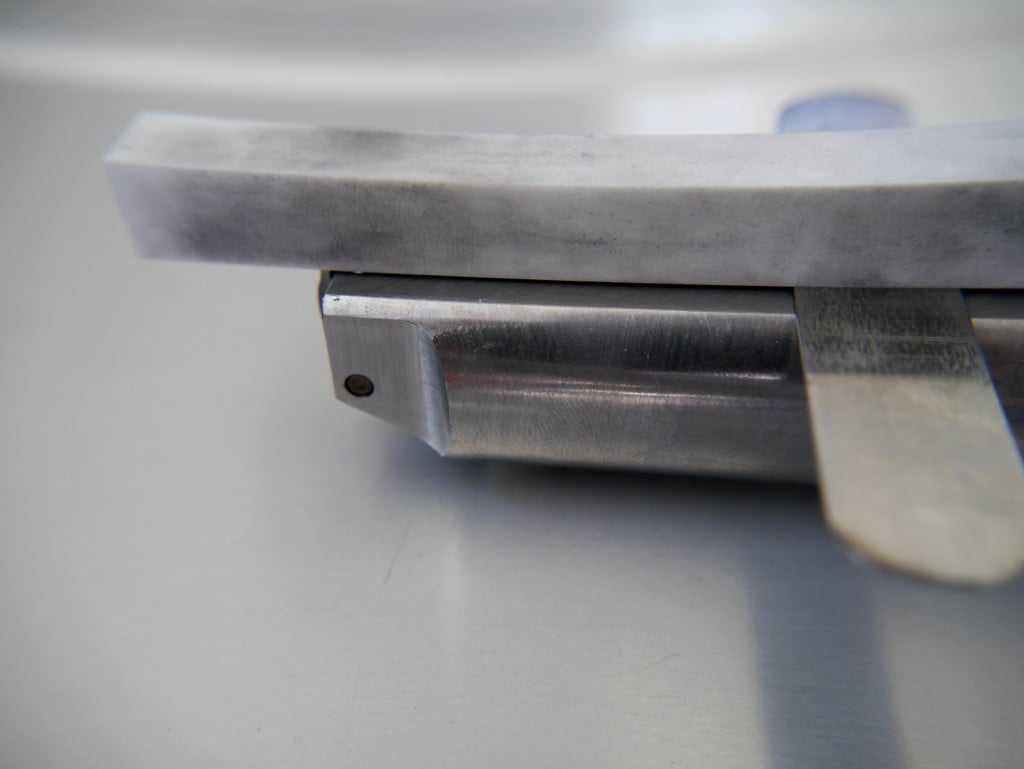
Load up the sear into the jig, put some oil on the bottom of the shim, and start honing the sear with the medium Arkansas stone until the matches up with the shim which is .02 inches high. Then run the fine ceramic stone over to make it shiny.
1911 Sear Jig, Top1911 Sear JigPolished 1911 Sear
Secondary Sear Angle
This is the 45 degree break in the sear to eliminate the creep in the trigger. The video will suggest going by hand, but I had good results using the shim as a guide.
1911 Sear 45 Degree
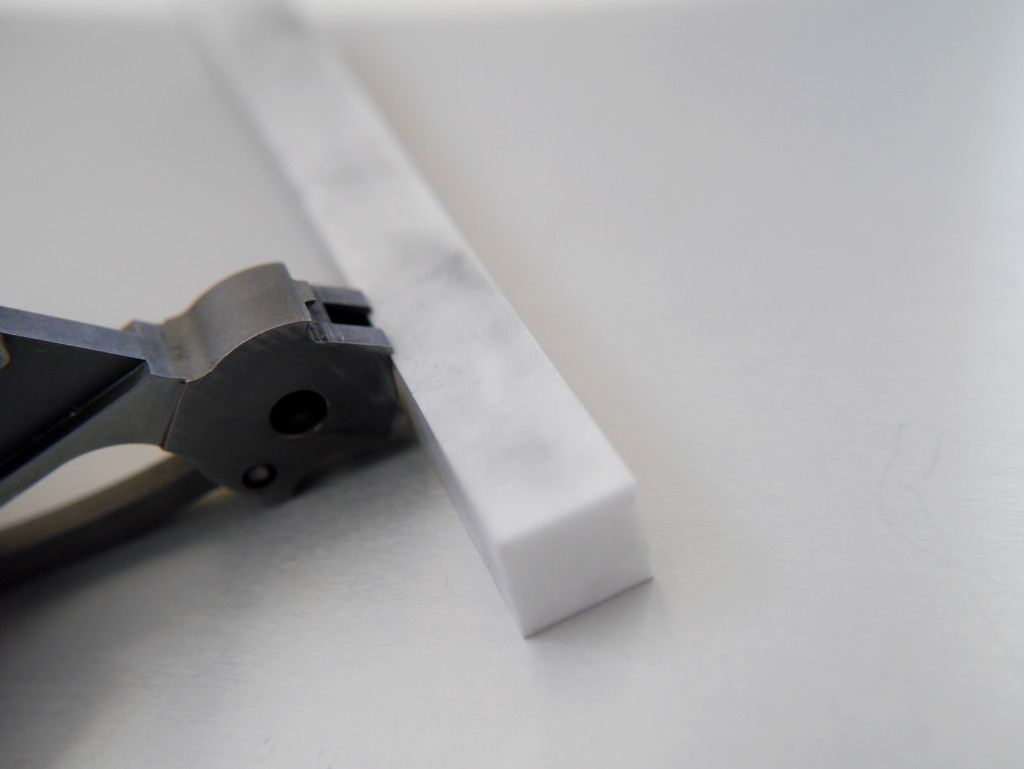
Hammer Hook Angle
You want these at a 90 degree angle. The best way is to use the straight edge of your stones. Do a couple swipes on the Arkansas stone and finish it off on the ceramic.
1911 Hammer Squaring
Check Your Progress
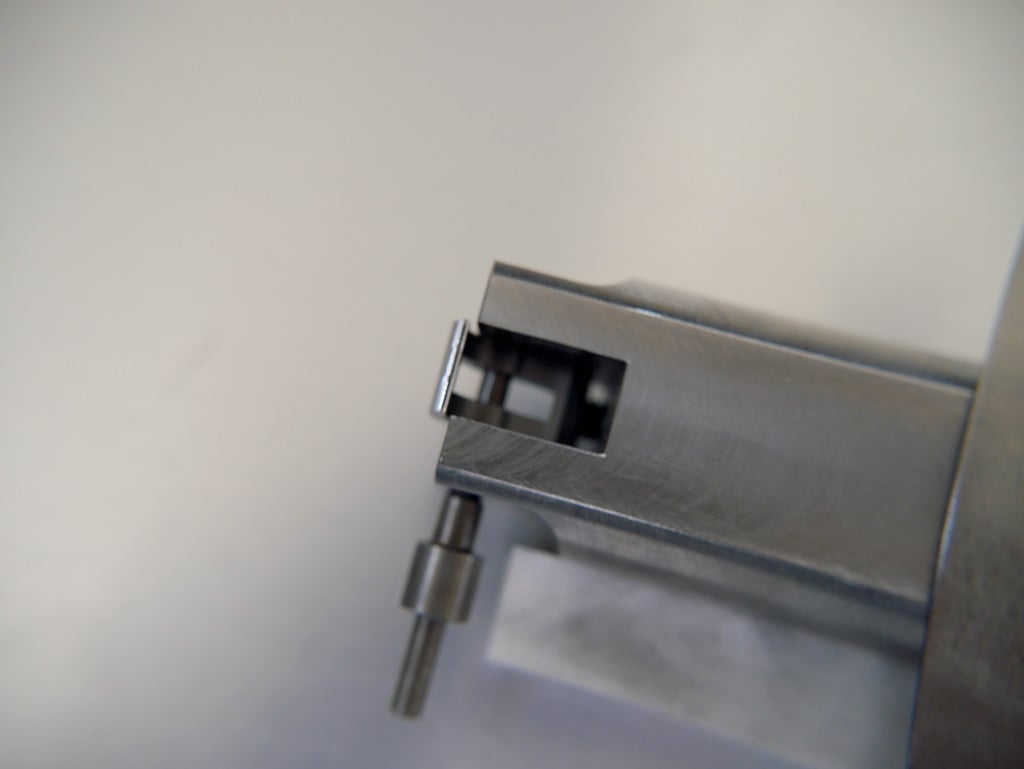
Here is where the trigger adjustment pins come in. I had to use some sandpaper to file down the pins’ diameter to fit my gun.
You can actually see the angles instead of putting everything together and trying to “feel” the difference. Although when done correctly, you’ll definitely feel a crisper trigger. Looks good!
1911 Sear & Hammer Adjustment Pins
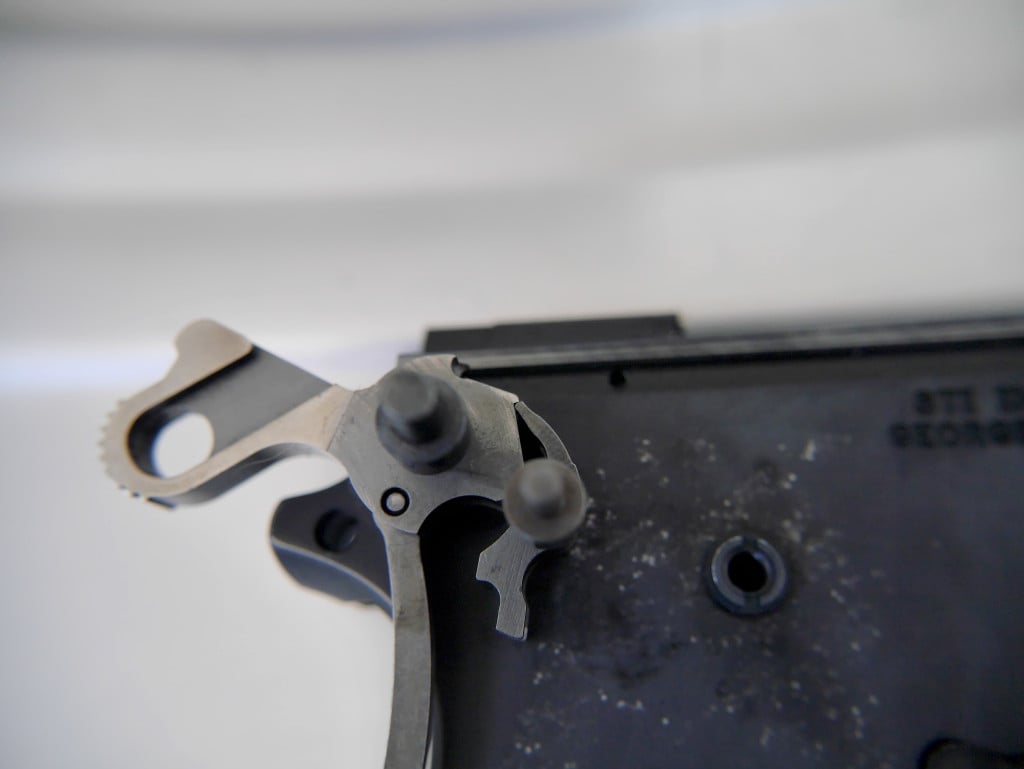
Update: And a closeup of the final product. I think it matches up with the detailed picture above. 3000+ rounds of safe and smooth firing so far (Feb 2016)
Sear Hammer Close Up
Video
This video goes over everything we talked about and a little more on polishing and tuning the sear spring. We’ll go over tuning the sear spring further down in the article after conducting function checks of what we’ve done so far.
Function Check
One of the most important parts. Always function check your gun after any modifications. It’s possible that you took too much off something, or tuned the sear spring too much. Easier to replace some parts than have your 1911 have an accidental discharge or go full-auto at the range.
Sear Spring Tuning and Lower Mainspring
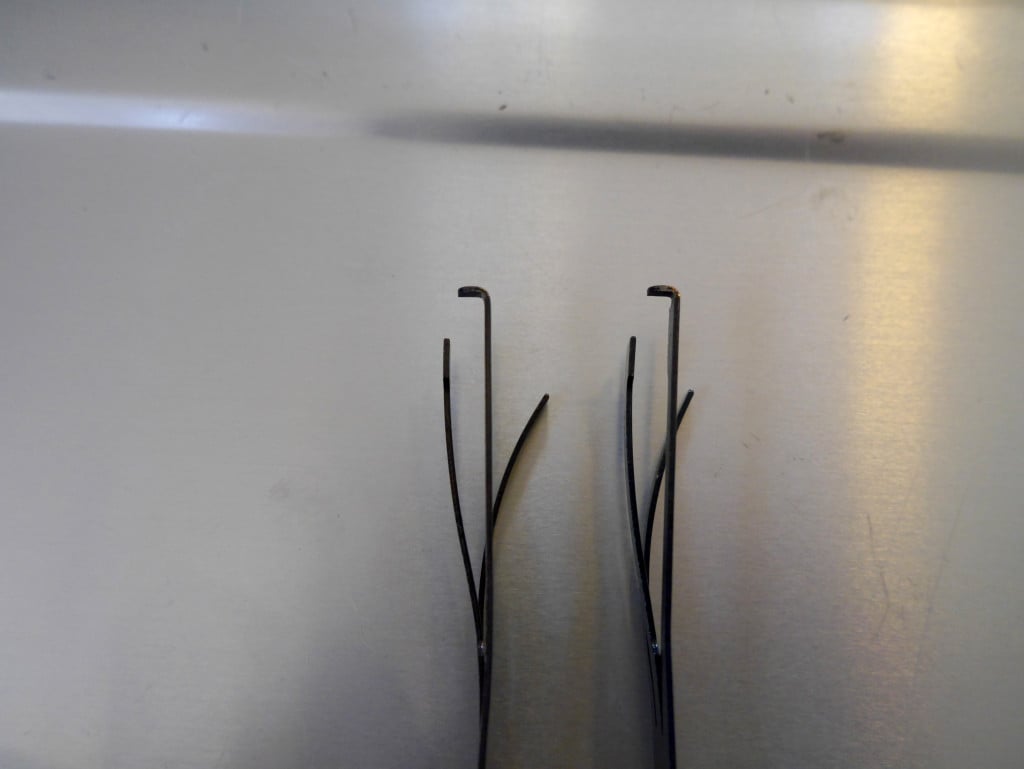
If everything functions properly, you can start to lower the trigger pull weight by bending your sear spring to lower the trigger pull.
This is done by bending the middle leaf back.
Make sure to grasp the bottom of the spring while you bend it. Just a little will have an effect. Put everything together and conduct another full set of function checks before you try out the trigger pull scale.
At the same time I also swapped out my mainspring to a lighter one.
If you have a .45 ACP 1911, you can normally go down to 20 lbs or even 18 for light loads. For my 9mm I went down to 17 lb for regular loads and 15 lbs for competition loads. If you start getting light primer strikes, you might need to go back up a few pounds. It makes a decent difference, but like GTT in the video, I don’t think the difference is 25%.
I ended up with a hammer follow problem so I threw my light sear spring away and started again. Below is my final result (there’s not too much visible difference). The right is my modified light one that has been safe and reliable for over 1500 rounds and clocks in at a sweet 3.5 lbs!
1911 Trigger Job Sear Spring