So you want to build your own AR-15 upper receiver?
We’ll make it quick and painless for you with photos detailing every single step and tips/tricks we’ve learned through many builds.
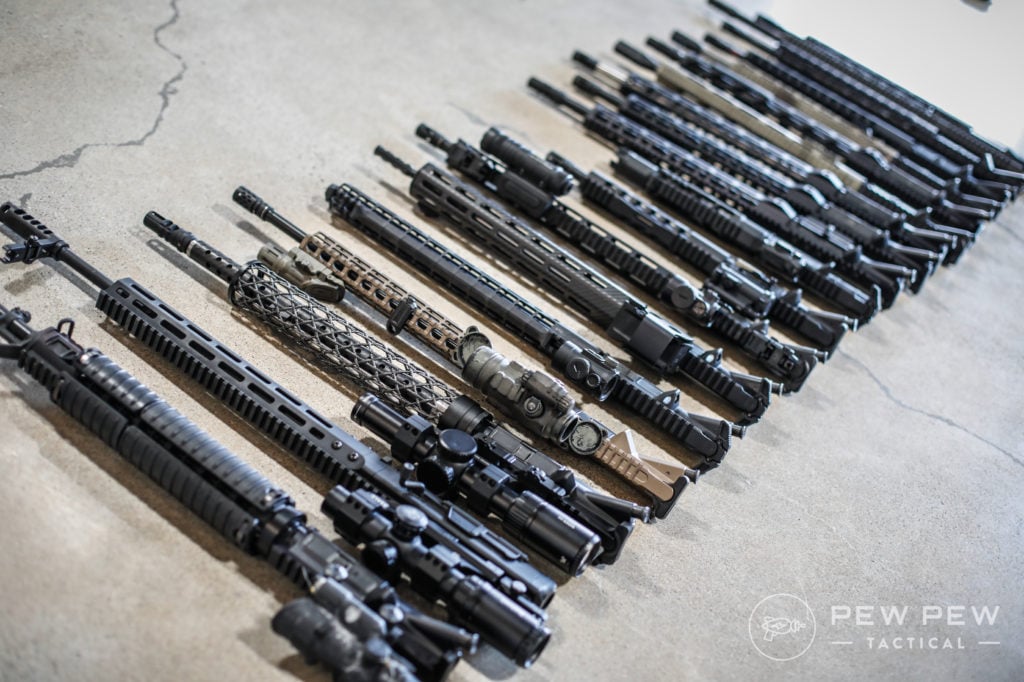
Plus, learn why we chose each individual part and which tools are really necessary for a successful build.
We’ll go through two different builds that should cover the major differences in gas blocks, barrel, and handguard installations.
A disclaimer that this is for educational use only. If you don’t have the right tools or experience, please have this done by a professional or buy a completed rifle.
So what are you waiting for…let’s get started!
Parts and Tools
Parts
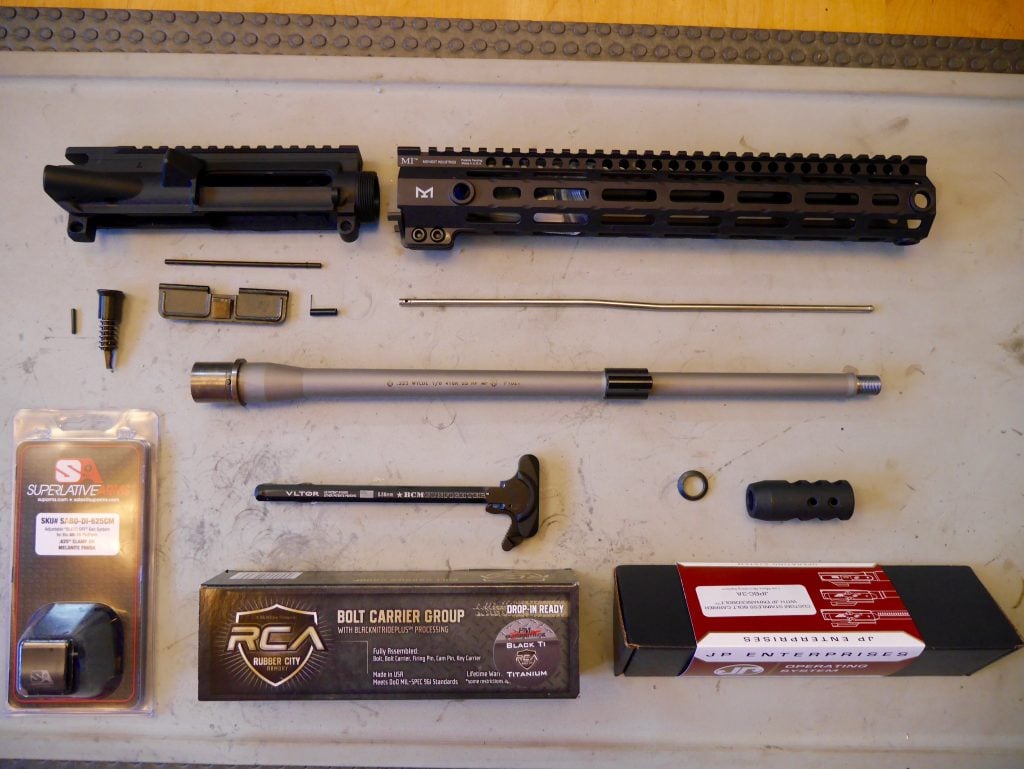
The AR-15 upper receiver holds all the good stuff that will determine the weight, accuracy, and general performance of your completed rifle. If you’re interested in building the lower receiver too, check out that article here.
And if you’re not super familiar with the major parts of an AR-15, I recommend reading my most popular article that covers everything in detail…Best AR-15 Buyer’s Guide.
Moving on!
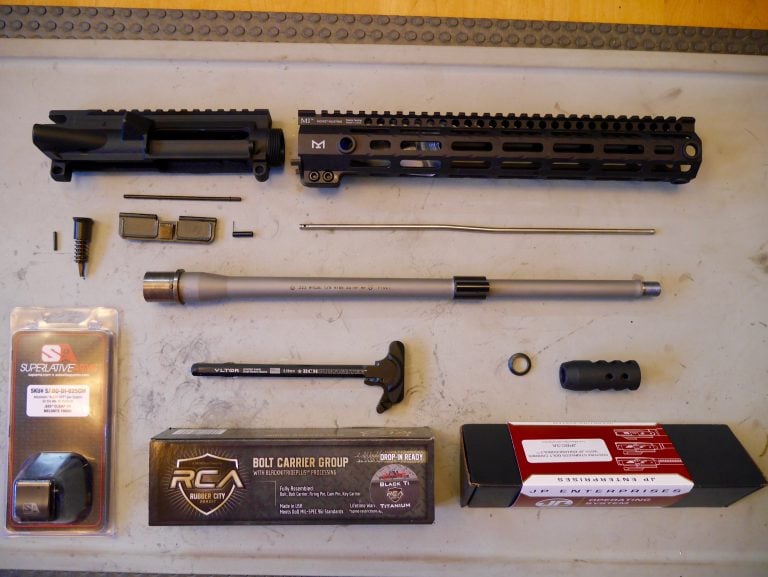
This first build is targeted towards competitive shooting and I go over the parts in detail in my Ultimate 3-Gun Rifle Build article (coming soon), but here’s a rough overview of each part:
- Aero Precision Stripped Upper Receiver ($80): My gold standard for upper receivers. I chose a stripped one (missing forward assist and ejection port cover) so I could show you how to install them. However, unless you want something custom there, go with the assembled one which costs $20 more…less than what the missing parts would cost anyways (forward assist and ejection port). My other suggestions for upper receivers.
- Ballistic Advantage Barrel ($150-$250): Recently bought by Aero and is now getting more and more popular. I like how they had exactly what I was looking for…a 16″ light-weight profile mid-length gas chambered in .223 Wylde. I chose the specs to get a lighter rifle (.625 diameter) that shot softly (mid-length) and had more inherent accuracy (.223 Wylde chambering). The added perks of it being a “Hanson” profile that reduced barrel whip + an included gas block were just frosting on the cake. In-depth review here (coming soon).
- Midwest 12″ G3 Handguard ($150-180): The newest iteration of my previous favorite Midwest handguard. Super light, strong, thin, and easy to install as you’ll see soon. I went with the M-Lok version for aesthetic reasons. In-depth review for the Best AR-15 Handguards (2018)
- Rubber City Titanium BCG ($360) and JP Aluminum Light Mass BCG ($335): For competition builds, the lighter materials of titanium and aluminum in the BCG combined with a tuned adjustable gas block give a super light recoil impulse since just the right amount of gas is being used to move a lighter object back and forth. See their in-depth review on the Best Lightweight BCGs (2018)
- Superlative Arms Adjustable Gas Block ($99): A newcomer who can barely keep their gas blocks in stock. I picked the clamp-on model for the .625 barrel for a tighter fit. I like them versus my previous gold standard of the Seekins ($60) because you don’t need to take off your handguard to adjust the gas and they have a bleed-off system that shoots the extra gas forward instead of all around (and onto my hands sometimes). See their in-depth review here (coming soon).
- BCM Gunfighter Charging Handle ($50): Goes on every serious AR-15 I have since you can feel the difference when you rack it, especially when you do it one-handed. I like the Medium size for extra grip but it’s not so large that it snags stuff.
- DPMS – Miculek Compensator 223 ($40): Designed by machine gun fingers himself Jerry Miculek. It’s a simple, but the very robust design that is perfect for Practical and Factory rifle competition. Since there are nearly endless options for muzzle devices, check out Differences between Flash Suppressors, Compensators, and Muzzle Brakes.
- Spike’s Gas Tube ($15): Although they are just tubes of metal, I go with a name I trust. This one got the mid-length.
Tools
Now we’re getting closer!
Here are the tools that I use for my build. There are only a couple necessary things but having the others will make your life a lot easier.
- AR-15 Upper Receiver Block ($40): You need to get this or borrow someone’s so you can put on the barrel without crushing, bending, or scratching something.
- Vice ($22): Best to have something more robust, but I’ve surprisingly made do with installing even stubborn barrels with just a clamp-on vice.
- Punch Set ($15): I prefer brass so you don’t mar up anything and it’s good for lots of other gun stuff too
- Hammer ($10): I like the rubber/plastic ends instead of standard steel since there are very few times when you actually need that much force…also if you use it directly on gun parts, you will not mar the finish
- 1/2″ Torque Wrench ($25): Makes sure you get proper torque when installing the barrel nut
- Wheeler Torque Wrench ($50): More necessary if you’re mounting scopes, but this helps for keeping the torque the same for the gas block.
- AR-15 Combo Tool ($20): Useful for lower receiver castle nut installs too, but not super necessary with the newer generation of handguards that give you a tool already (or are proprietary)
- Feeler Gauge ($8): You’re supposed to set the gas block .025″ away from the barrel shoulder and this makes it easy. Otherwise, you can use two business cards. Reason being is that the standard location of the gas block is to allow an A2 handguard end-cap to sit. Even though we’re not using it, we’ll have to account for it.
- .223 Headspace Gauge ($29): No-Go Gauge will tell you if the headspace on your barrel is off and that the gun could go boom when you shoot it. There’s a lot of debate on whether you really need to check if you buy your barrel and BCG from a reputable company. I personally haven’t used one for my AR-15 builds and I still have all my fingers…but for some, it’s a small cost for peace of mind.
AR-15 Upper Receiver Build #1
Finally, right? Let’s do this!

Gather up all your stuff!
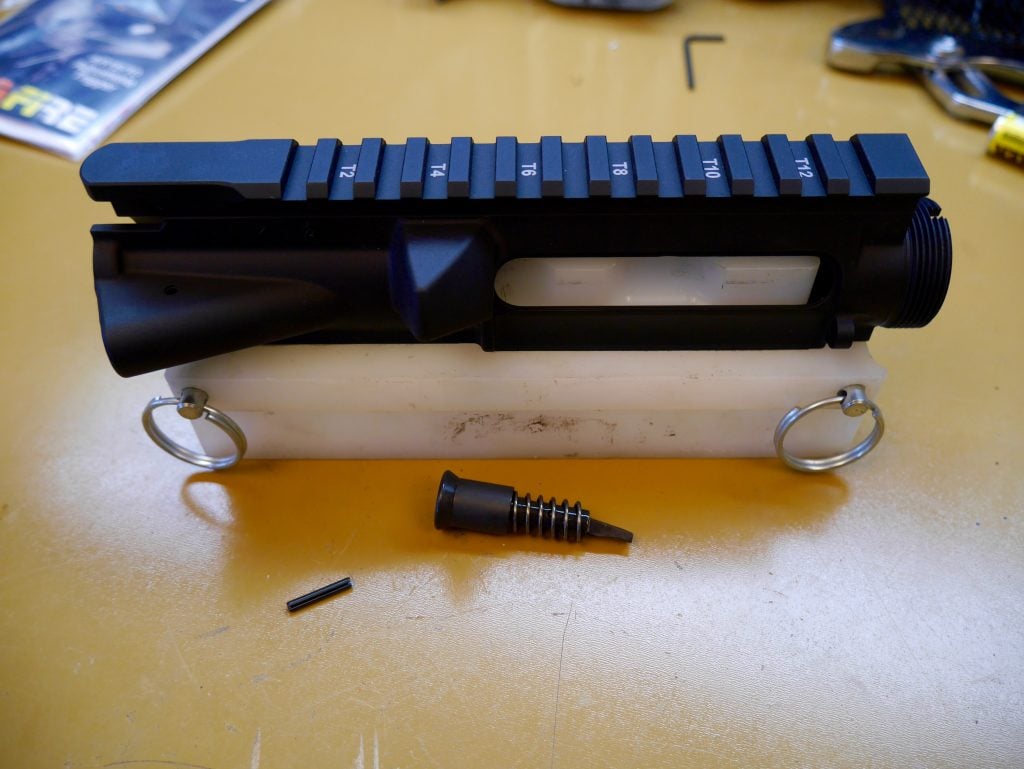
These next few steps are for a stripped receiver. If you bought an assembled receiver, just skip the forward assist and ejection port cover install.
First, place your upper receiver into the vice block and find the two pieces of the forward assist.
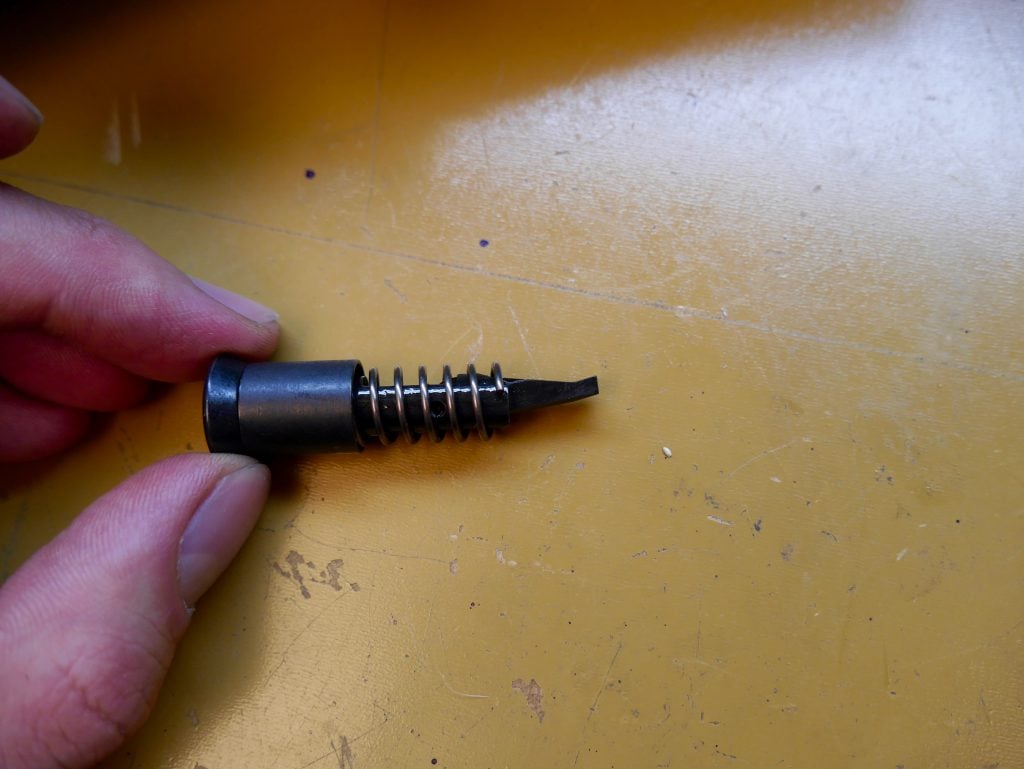
When we install the FA (forward assist), make sure that its “tooth” is facing in towards the receiver. It’s this that catches the serrations of the BCG to make it go forward.
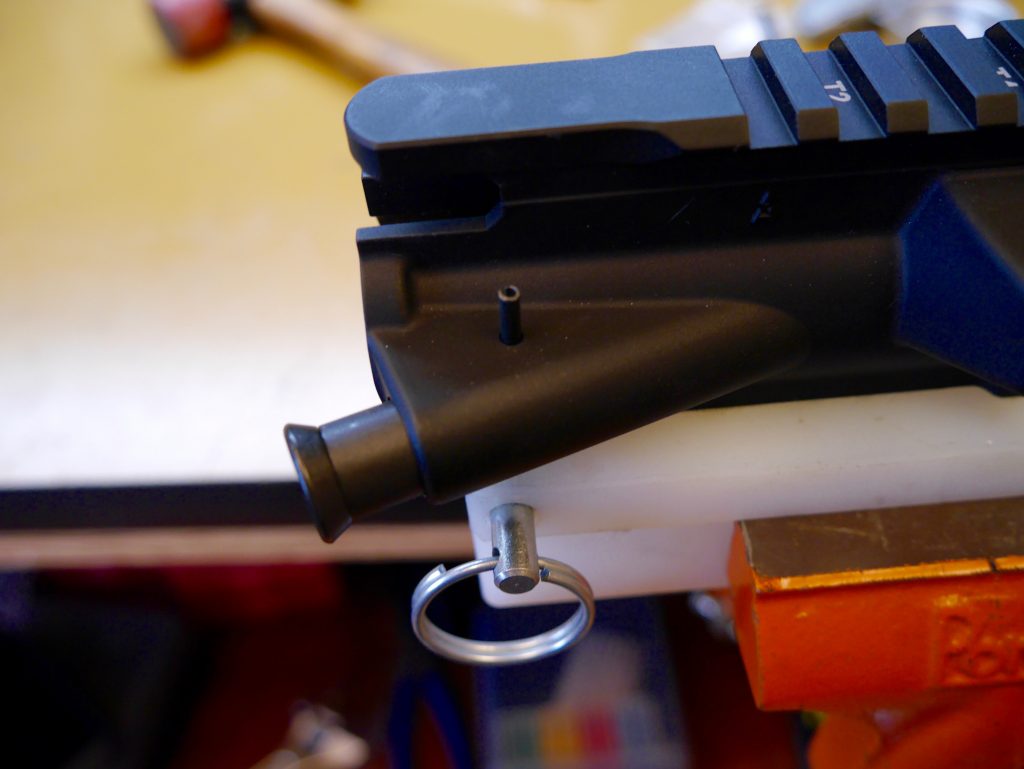
Attach the block with the receiver to your vice. Put in the FA with the correct orientation and start the roll pin with a punch.
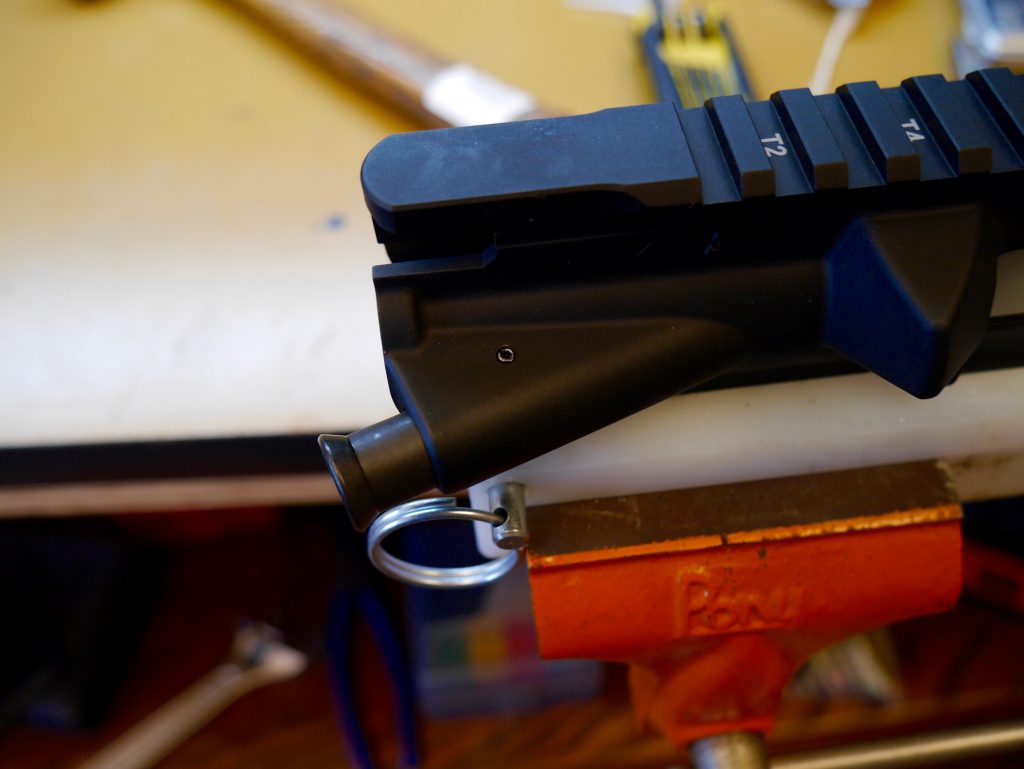
You’ll have to press in the FA while you install the pin so a raised portion will get caught by the pin and keep everything in place. You’ll likely need a third hand for this part, or gently use the hammer to tap in the pin enough so the FA cannot come out and finish it off with the punch.
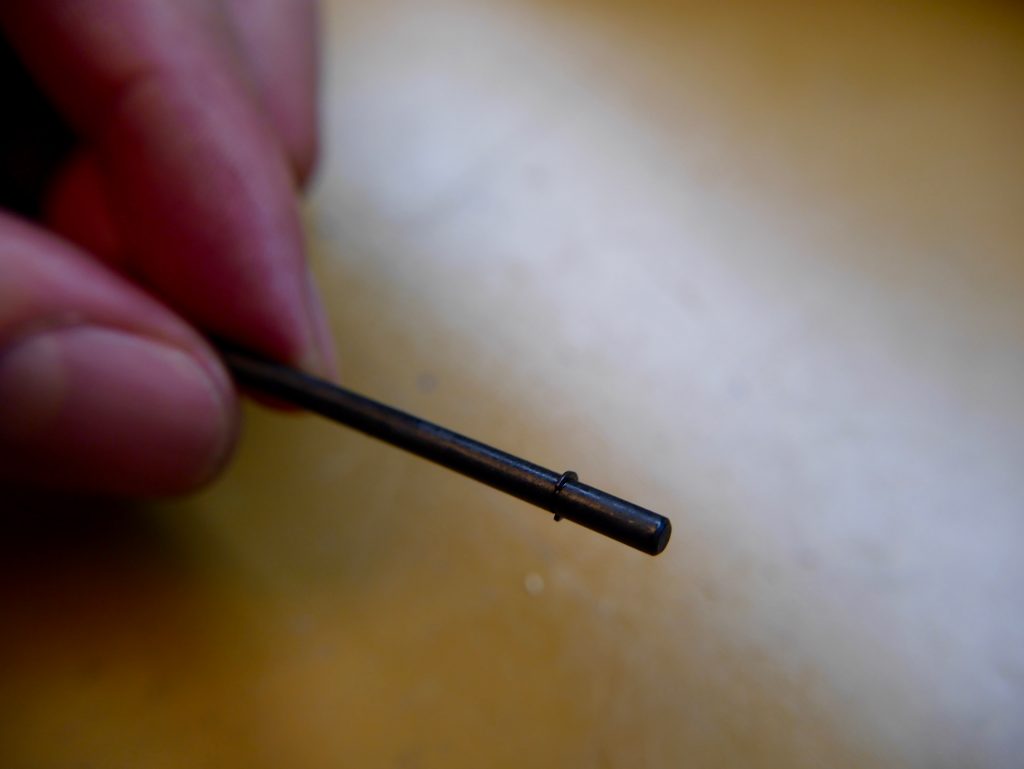
Now it’s time for the ejection port install. Hopefully, the pin already has the C-shaped snap ring installed.
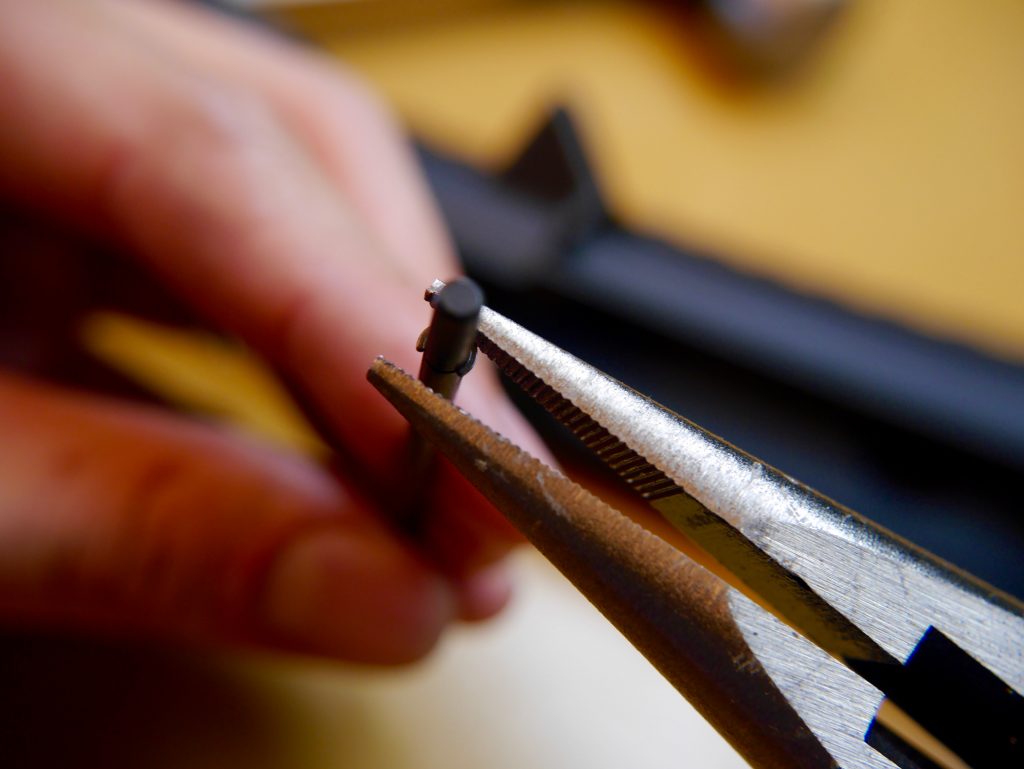
If not, you’ll have to do it with some pliers on the cutout. Watch out…I’ve lost that little sucker before.
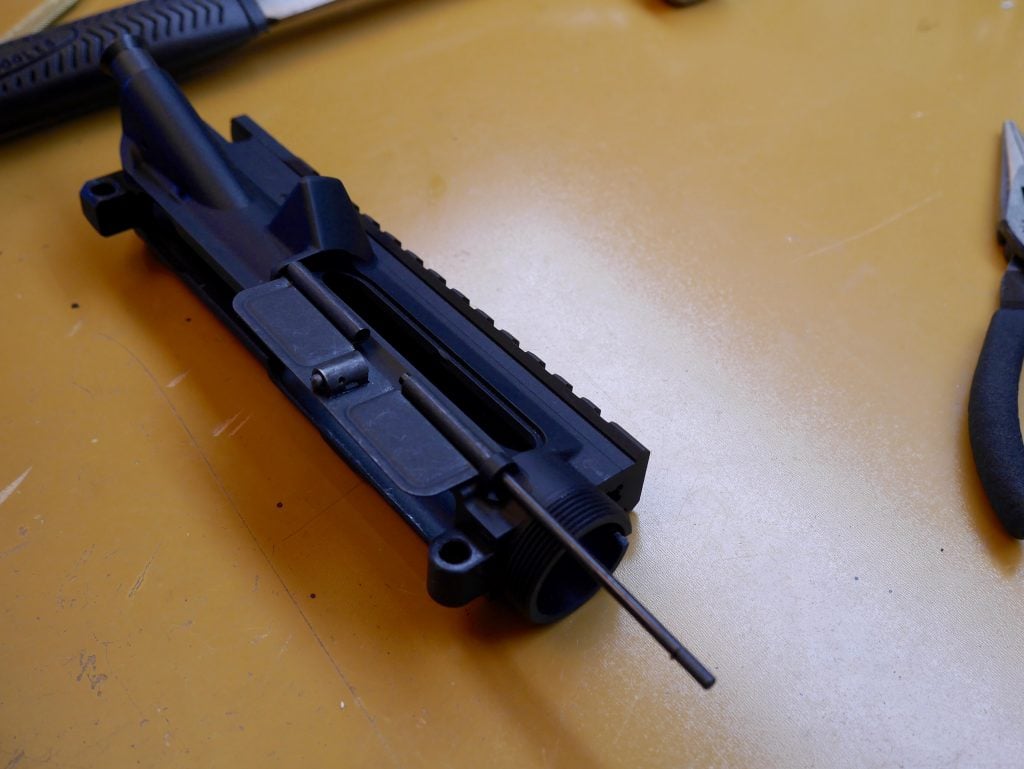
Place the ejection port like so and slide the hinge pin just so it shows into that middle exposed area.
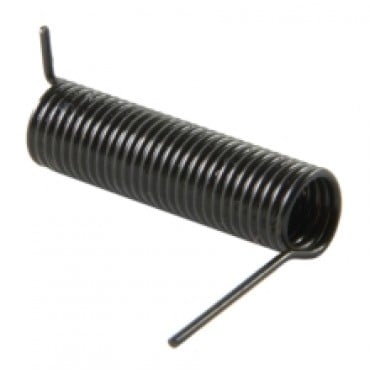
Take the spring in this orientation, and twist it 180 degrees.
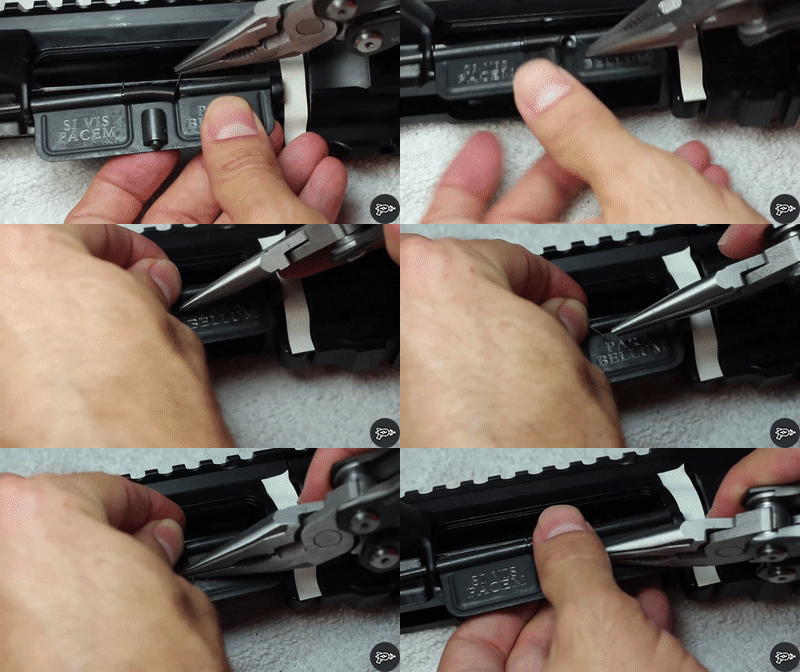
Place it in the empty area and try like hell to push the rod through. It should have proper tension to want to keep open.
Take a look at your barrel. Another thing I love about Ballistic Advantage is that it includes a gas block which will save you at least $20-30. It’s also already pre-drilled for a pin that will keep it super secure. However, we’re going with an adjustable gas block so I take it off.
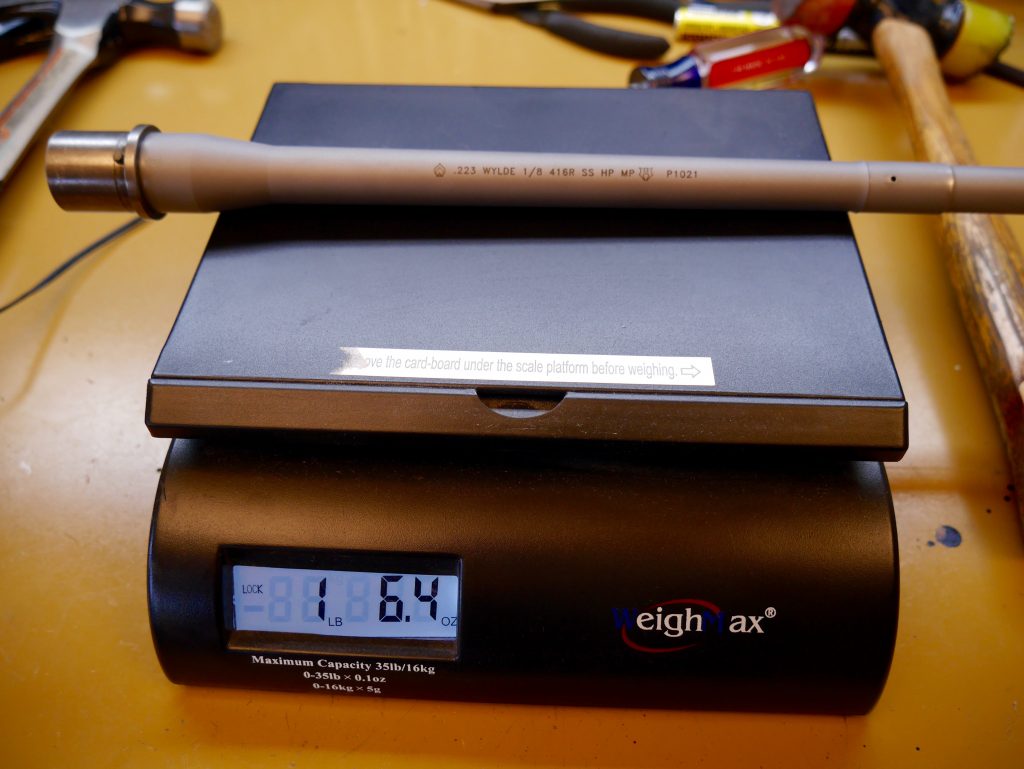
Pretty light…for example, a standard profile 16″ barrel would run around 28-30 oz while this one is just around 22 oz. Ounces equal pounds and pounds equals pain!
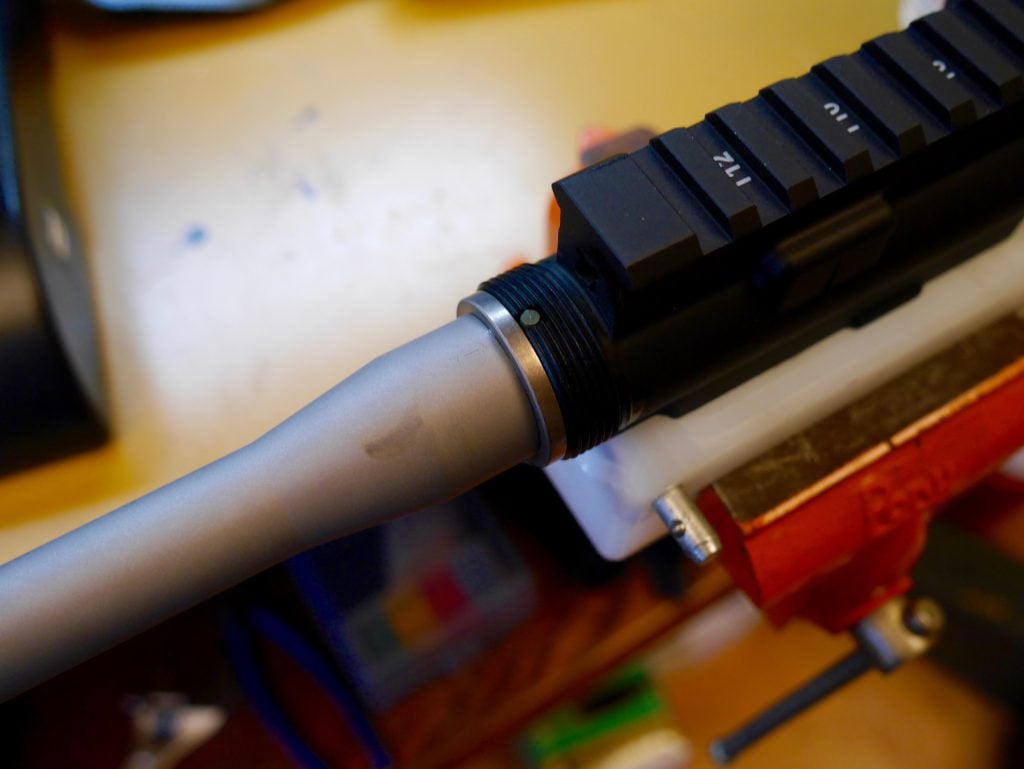
Install the barrel with the index pin fitting into the receiver. I use a light layer of gun oil to make it slide more easily.
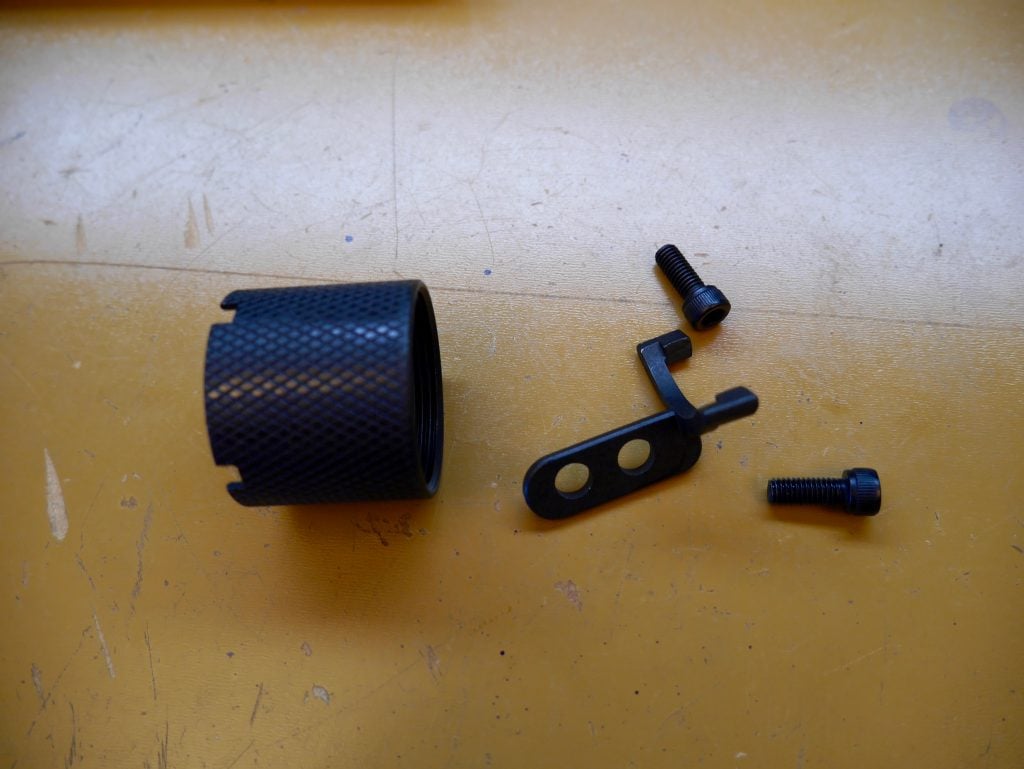
Find the barrel nut and place it on to the barrel. The other parts shown above are for mounting the Midwest handguard.
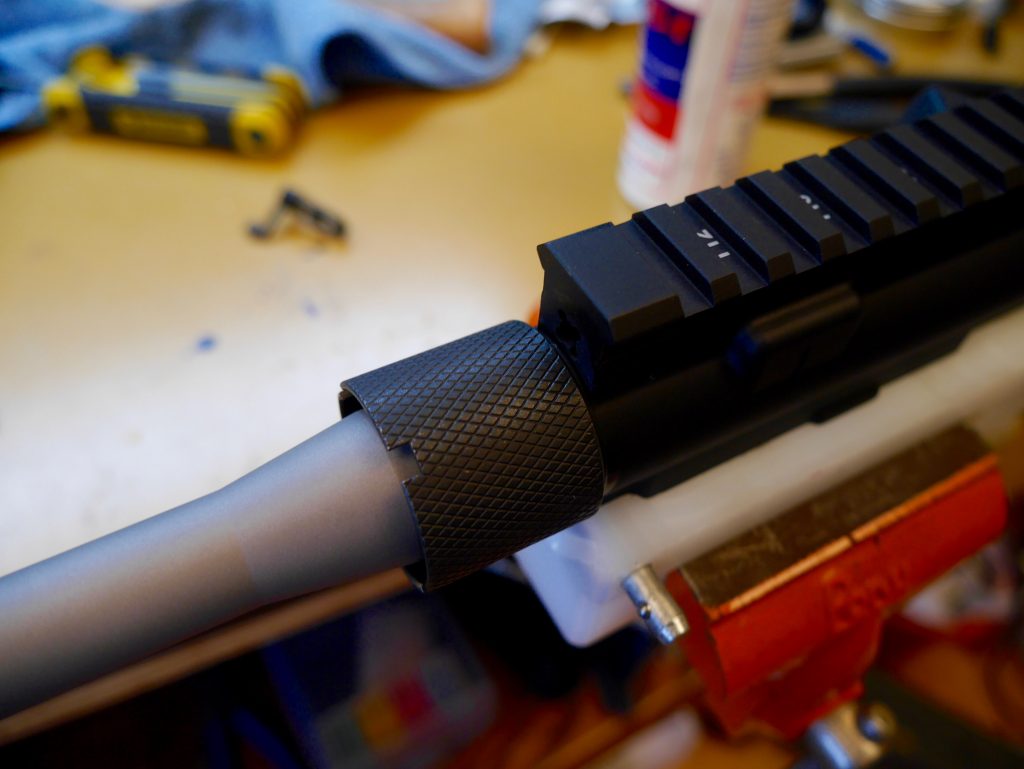
I will grease/oil up the threads here to make the surfaces mate up more easily.
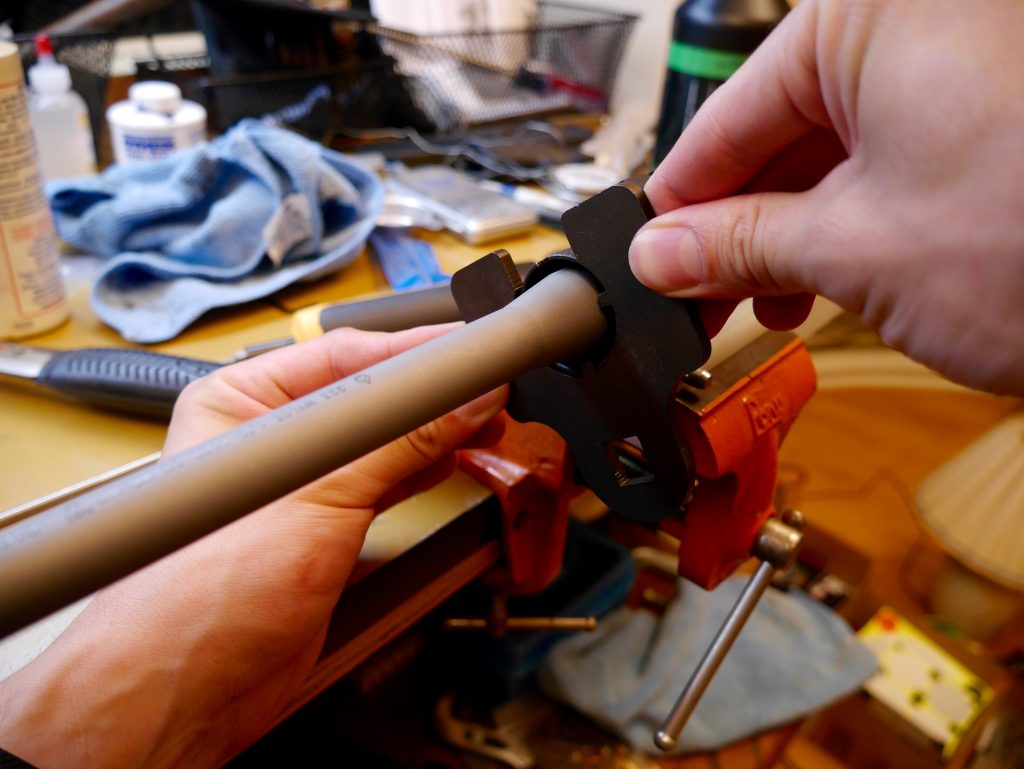
This is an example of the “tool” that comes with most modern handguards and will fit into the barrel nut. There’s much less need for the AR Combo tool, but instead, you need a torque wrench. I forgot to take a picture of the torque wrench for this build, so this is a pic from Build #2. It goes into the square hole (1/2″) of the included tool.
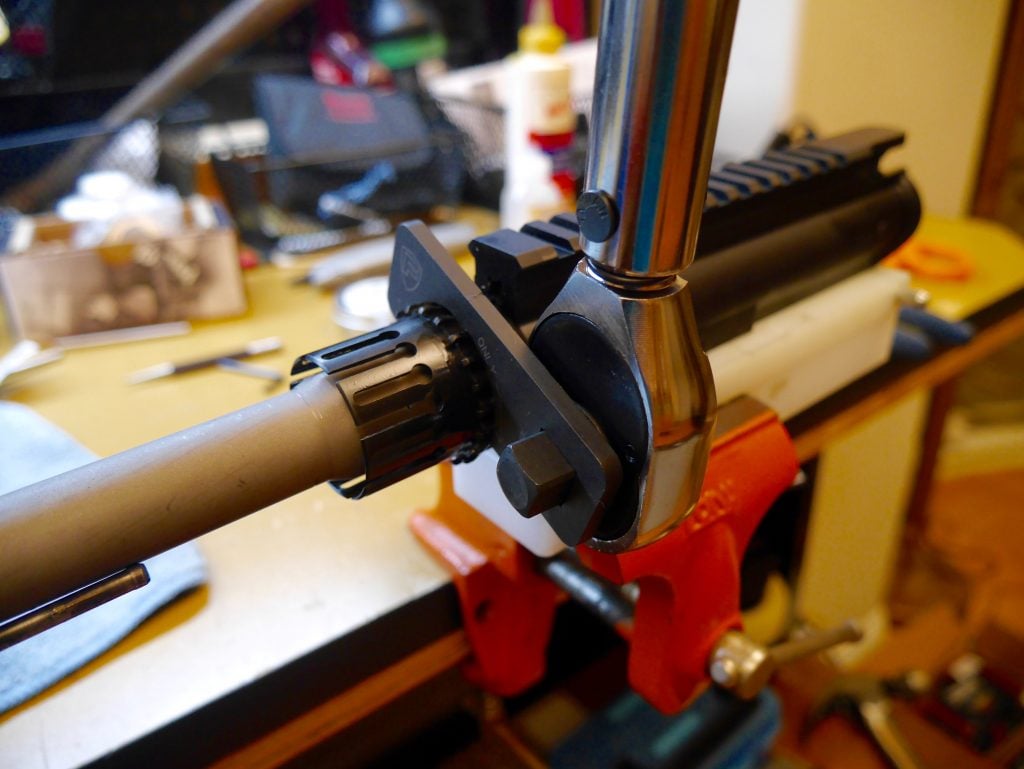
The proper procedure is to set the torque to 35 ft-lb and loosen, then do it one or two more times. This helps for a better seating between the surfaces later. What happens next depends on your specific handguard.
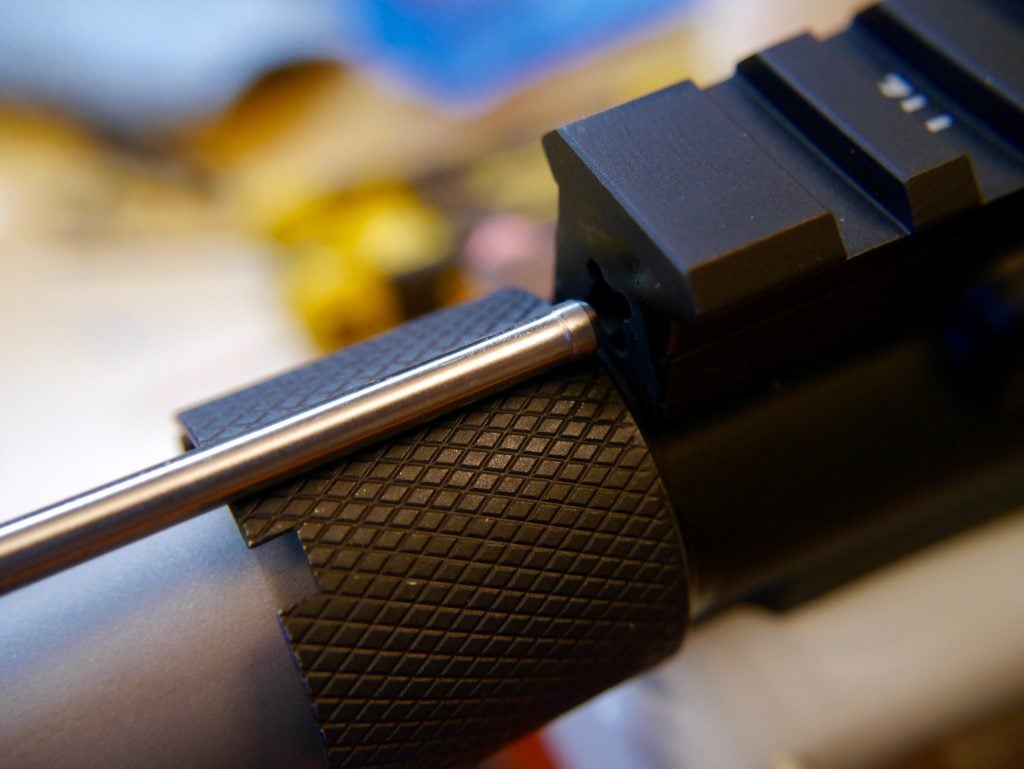
One reason I love the new Midwest handguard is that it doesn’t have annoying alignment issues like older versions of many handguards like pictured below…
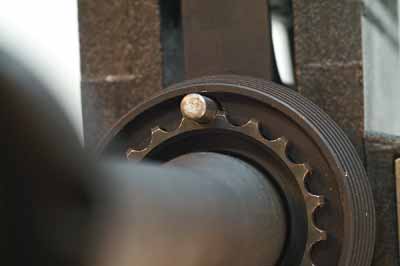
…Sometimes it takes an inhuman amount of strength to make the gas tube fit on straight with the gas block and also straight into the index “U” of the barrel nut (we’ll see this in Build #2).
But I digress…since we have the Midwest G3 handguard, I would set the torque to 50 ft-lb or so (max is 80 ft-lb) and finish it up.
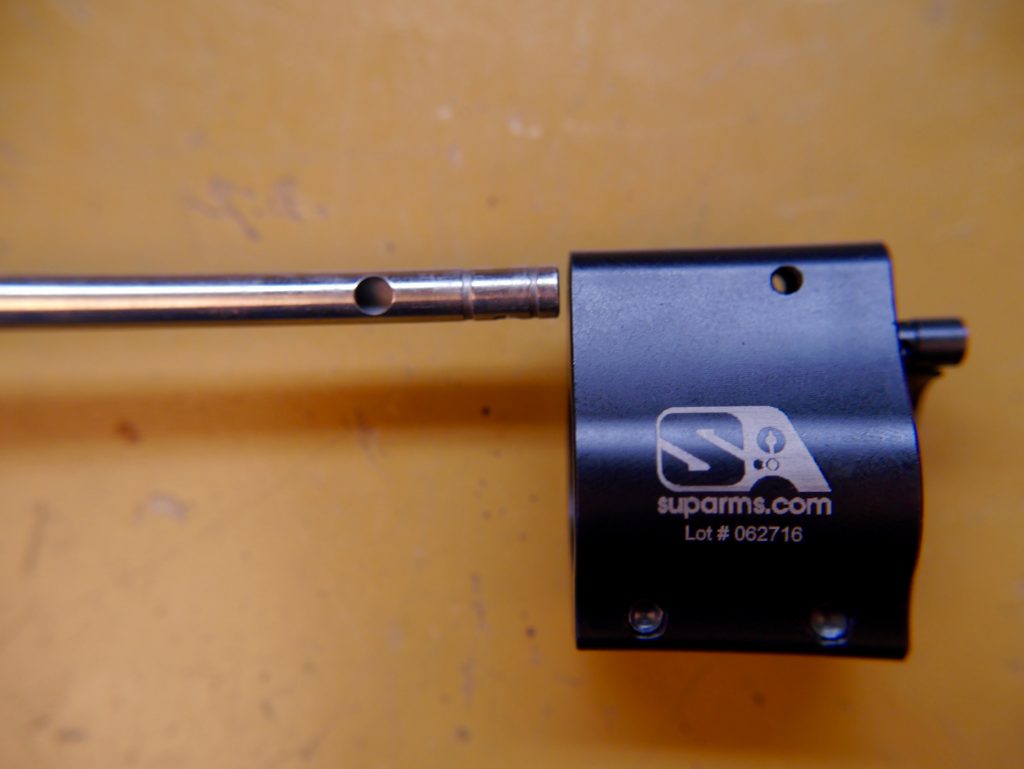
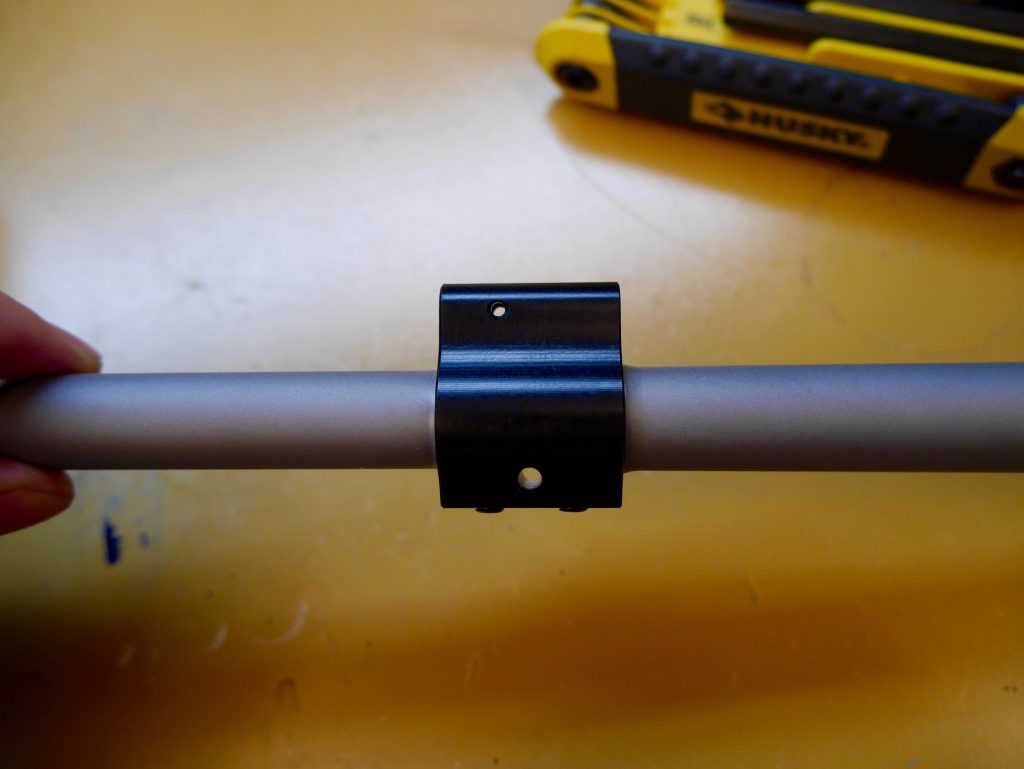
Get your gas block and gas tube out. There’s a side with a bigger hole for the gas tube. This is going to face down when it goes into the gas block.
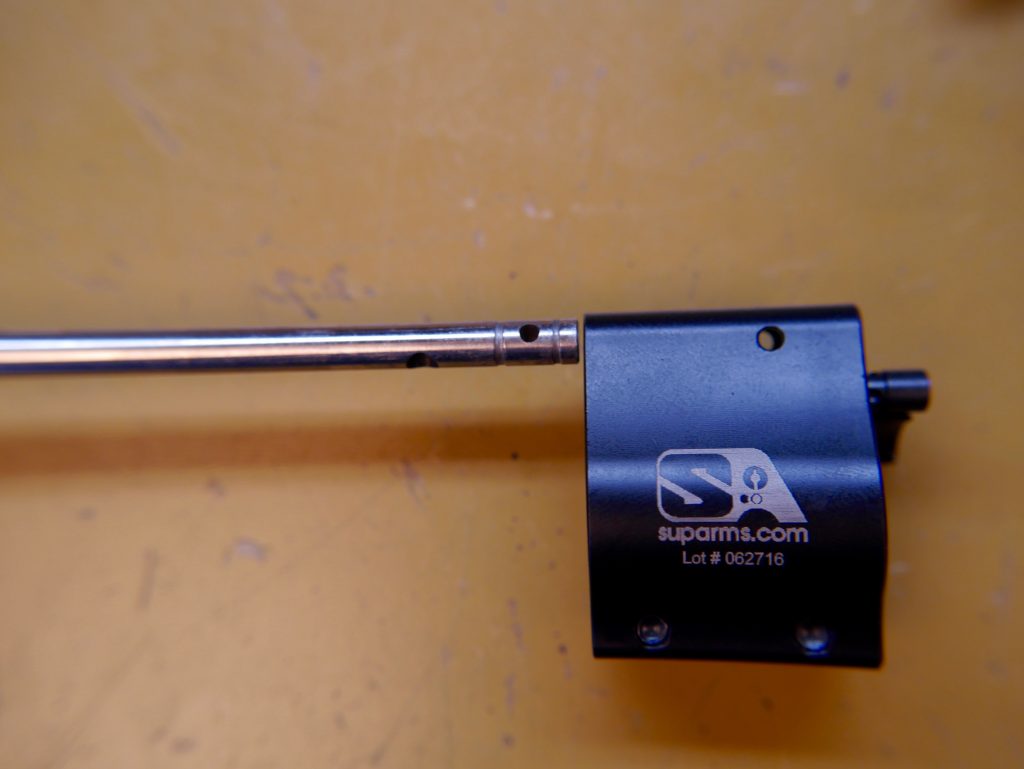
You can see the bigger hole is facing down while the smaller hole will match up with the holes on the side of the gas block.
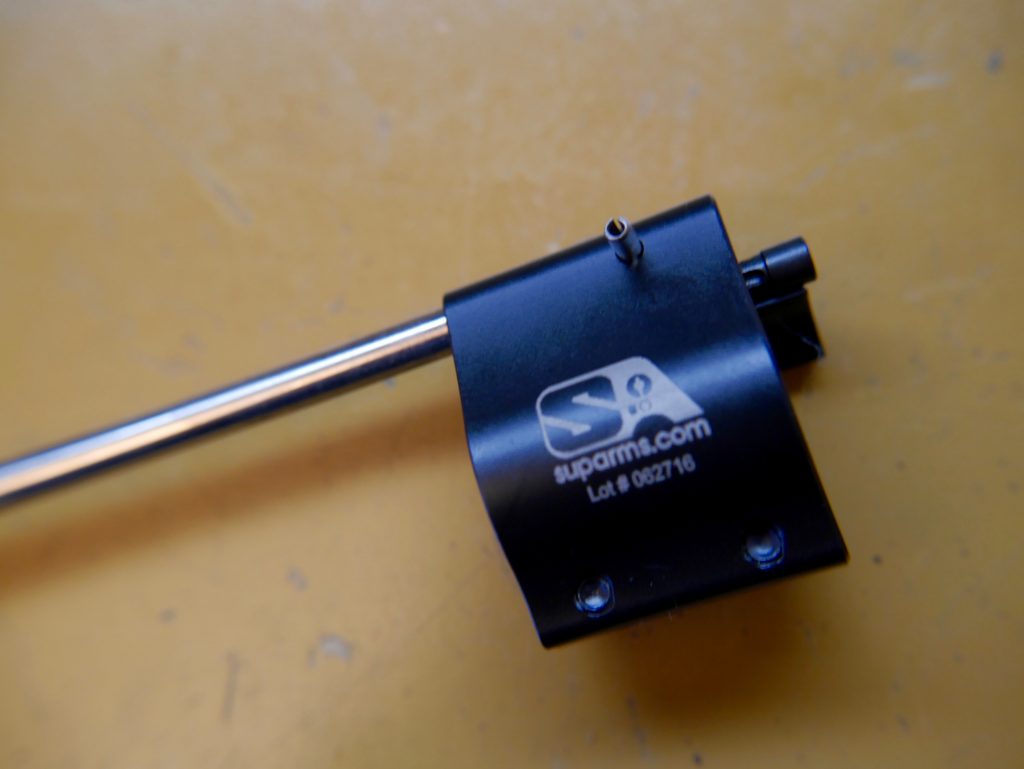
Start the roll pin. I like to scrunch up one end with pliers so it has a smaller point and then lightly tap it in so it just grabs onto the gas tube.
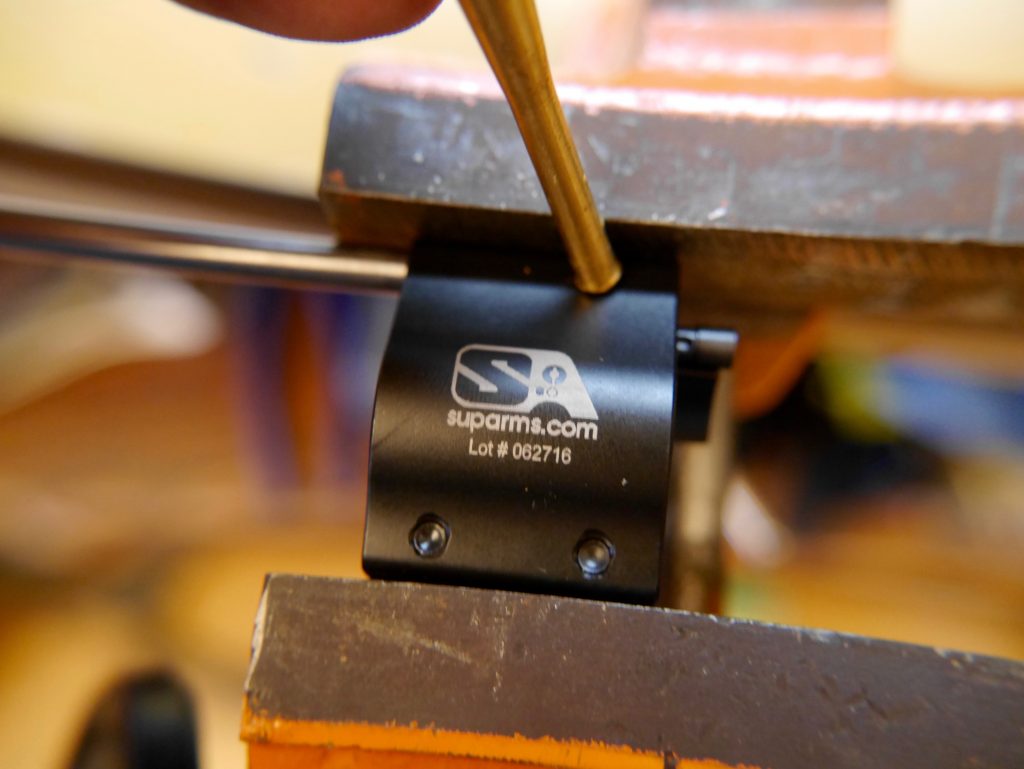
I put the whole thing into the vise (you can put some cloth or plastic on the jaws if you’re afraid of marring) and finish the pin.

Slide on the gas tube over the barrel.
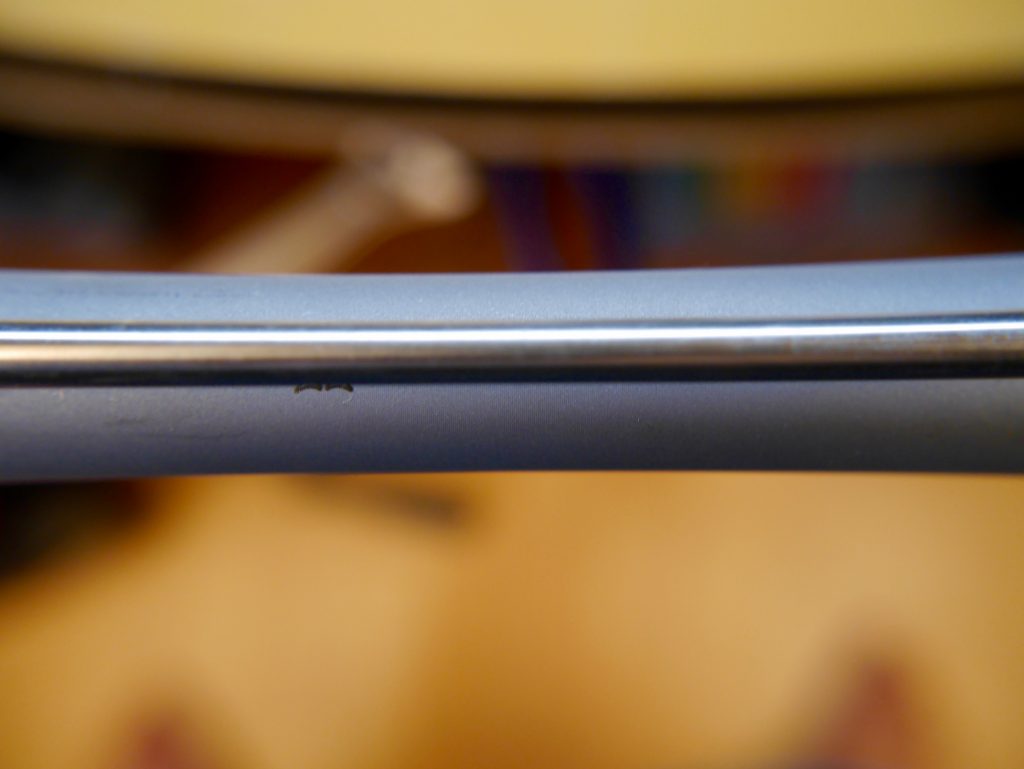
I align it with the words on the barrel (looking straight down).
For those of you who are using barrels without words exactly in the middle, what I suggest is marketing the middle of the barrel using the gas hole as a guide and also marketing the middle of the gas block. Check out the YouTube video above for a better explanation.
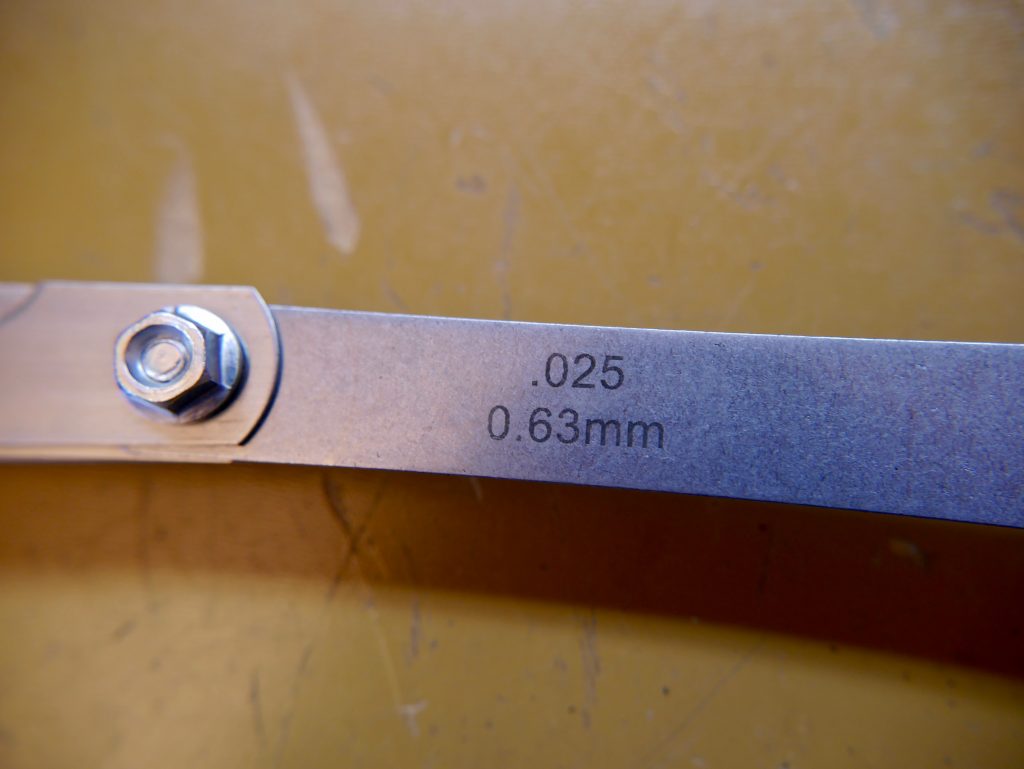
I also use a .025″ space to move the gas block back for the best fit. For a couple builds I never knew about this and everything still worked fine. However, now that I know, I like doing it the real way.
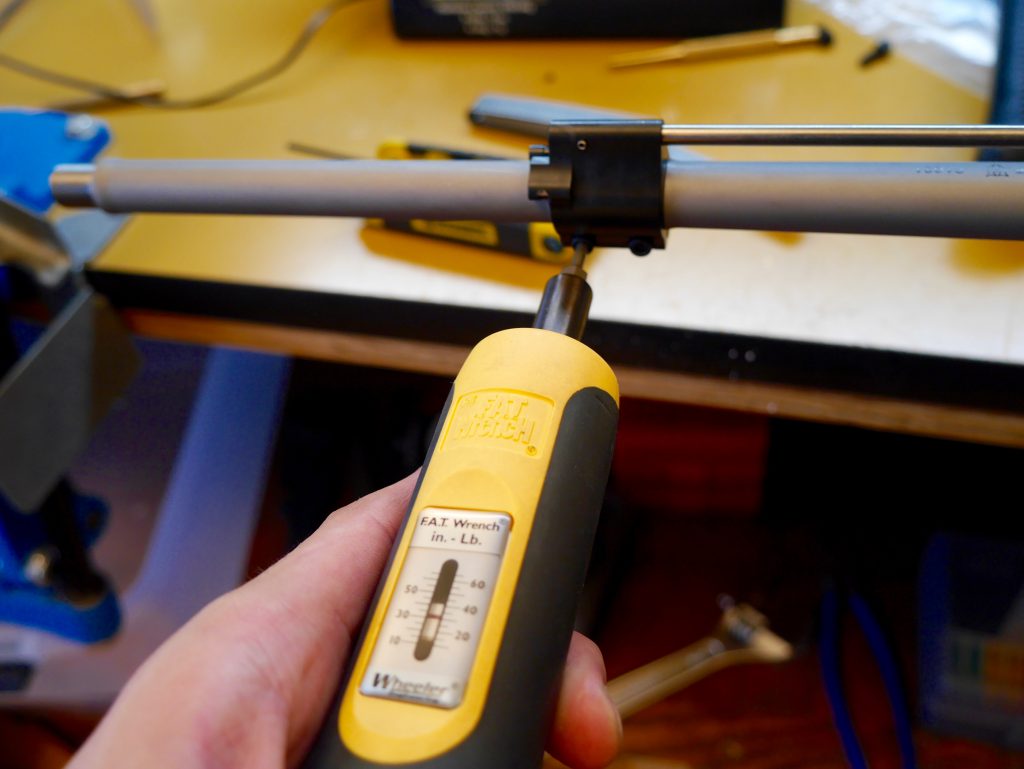
Take out your Wheeler torque wrench, set it to 35 in-lb (according to Superlative Arms, check your specific gas block instructions). Now the torque is even and it should not be going anywhere!
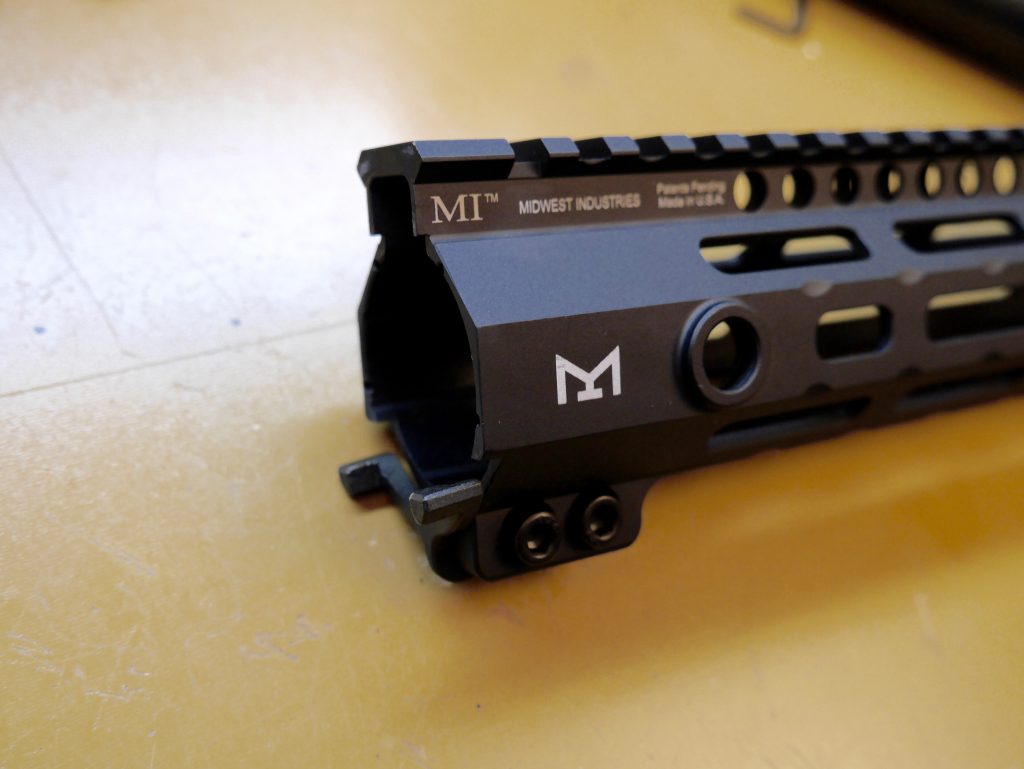
Install your Midwest handguard mounting hardware.
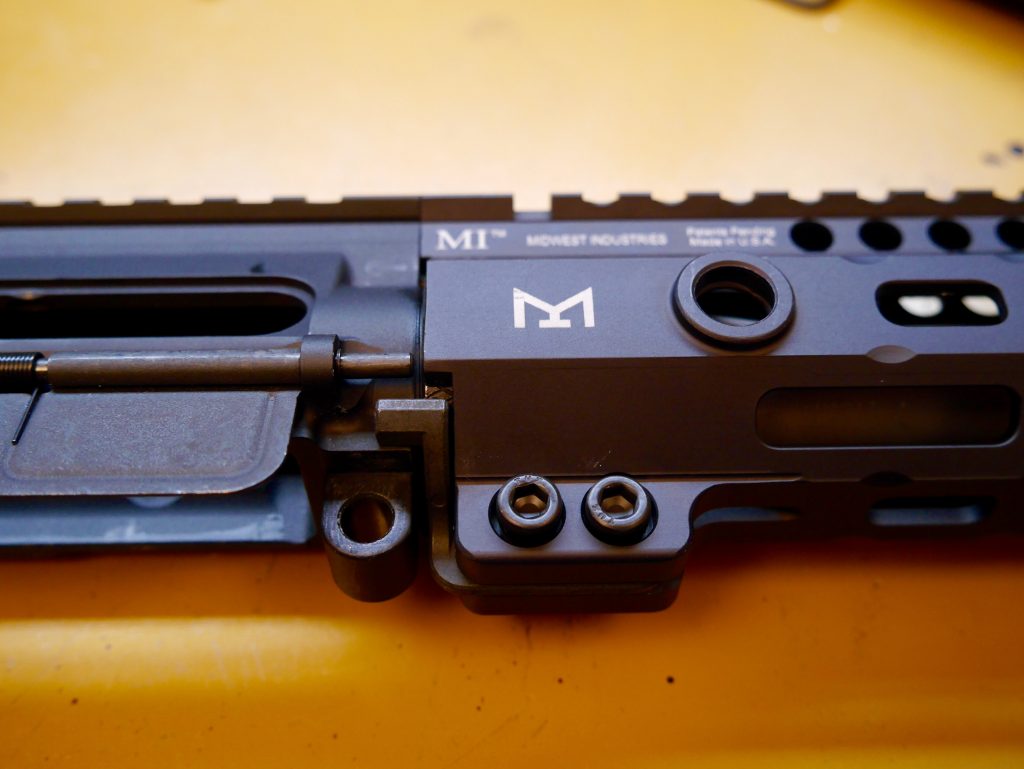
And fit it to the receiver. It should align perfectly. One thing I did figure out the hard way was to make sure the indexing pin thing is completely flush at the bottom near the screws.
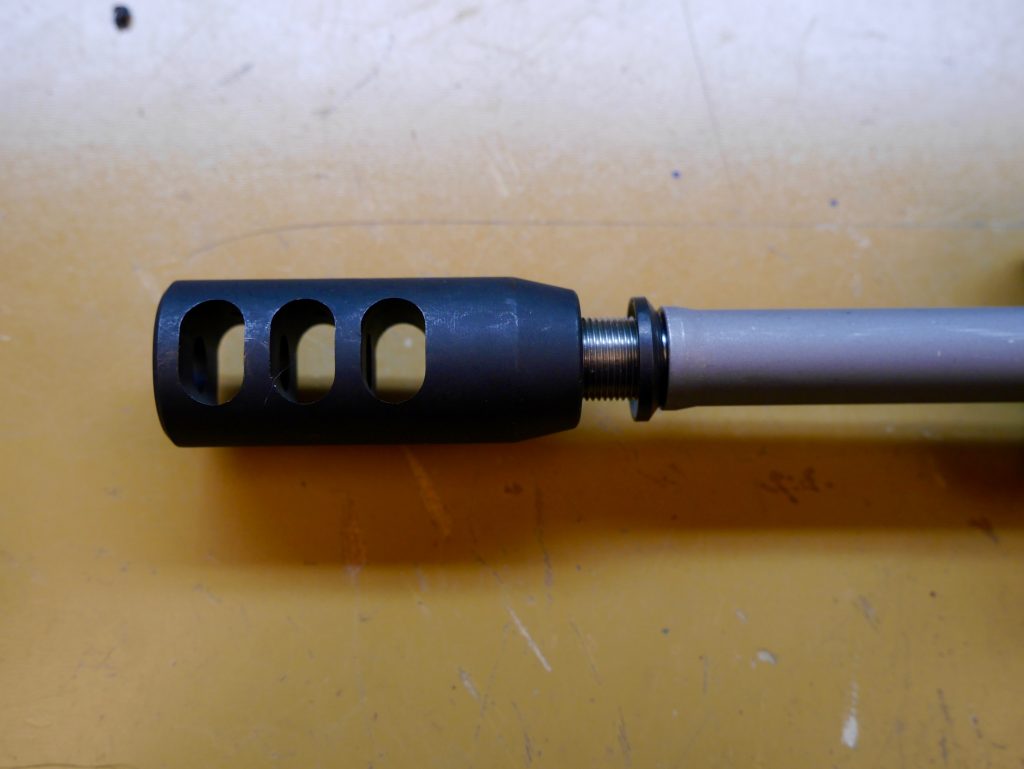
Install your muzzle device and if it does come with crush washers, make sure it’s the smaller side towards the barrel.
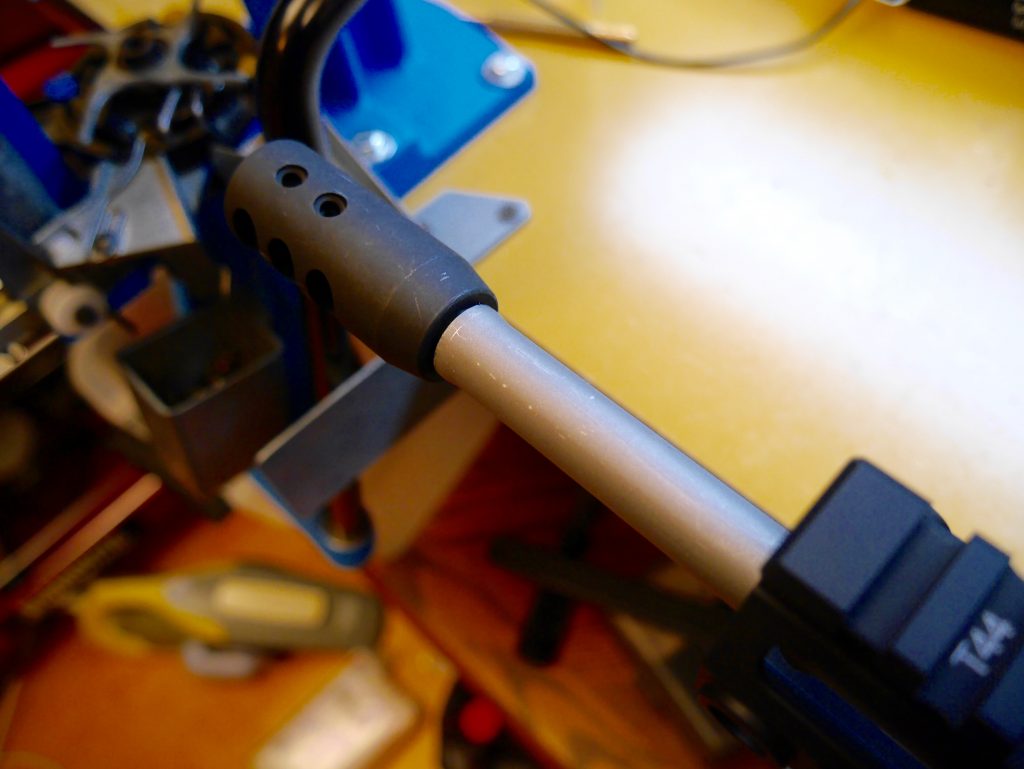
Make sure to use the crush washer! The above shows it without the crush washer since I couldn’t muscle it on with just a wrench but then I realized with this particular muzzle device I could place a thick screwdriver through the ports on the side to turn it. Make sure you end up with the top holes aligned like so and the big ports on the side. This is so the majority of the gases are vented to the side (sorry shooting range neighbors) and some are vented to the top to counter muzzle rise.
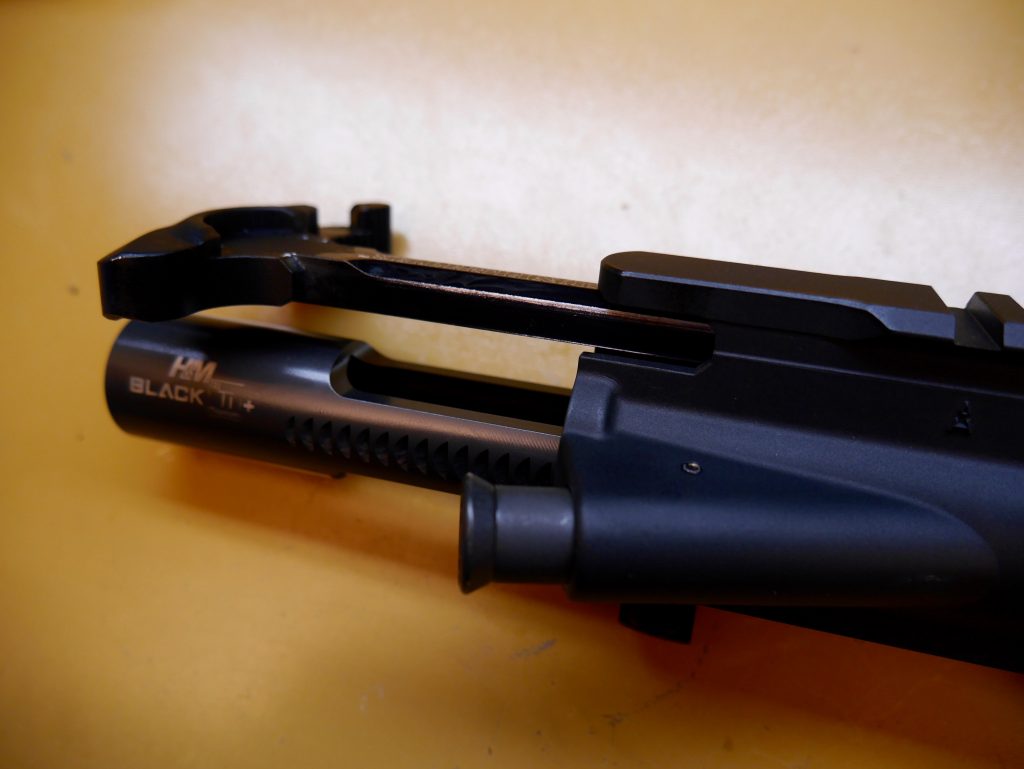
Lube up your BCG and charging handle and you’re done! See how it performs (coming soon).
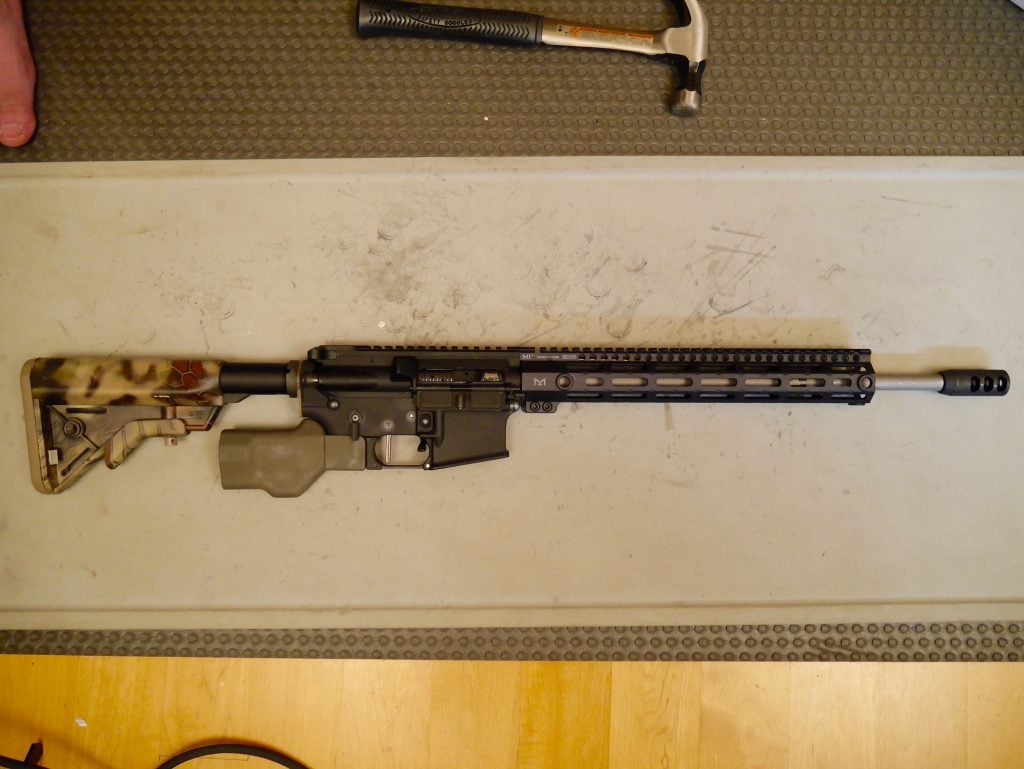
AR-15 Upper Receiver Build #2
This build covers parts that are different from Build #1 but are still fairly common in many builds. This includes a barrel nut that has the gas tube alignment tabs and a set screw based gas block.
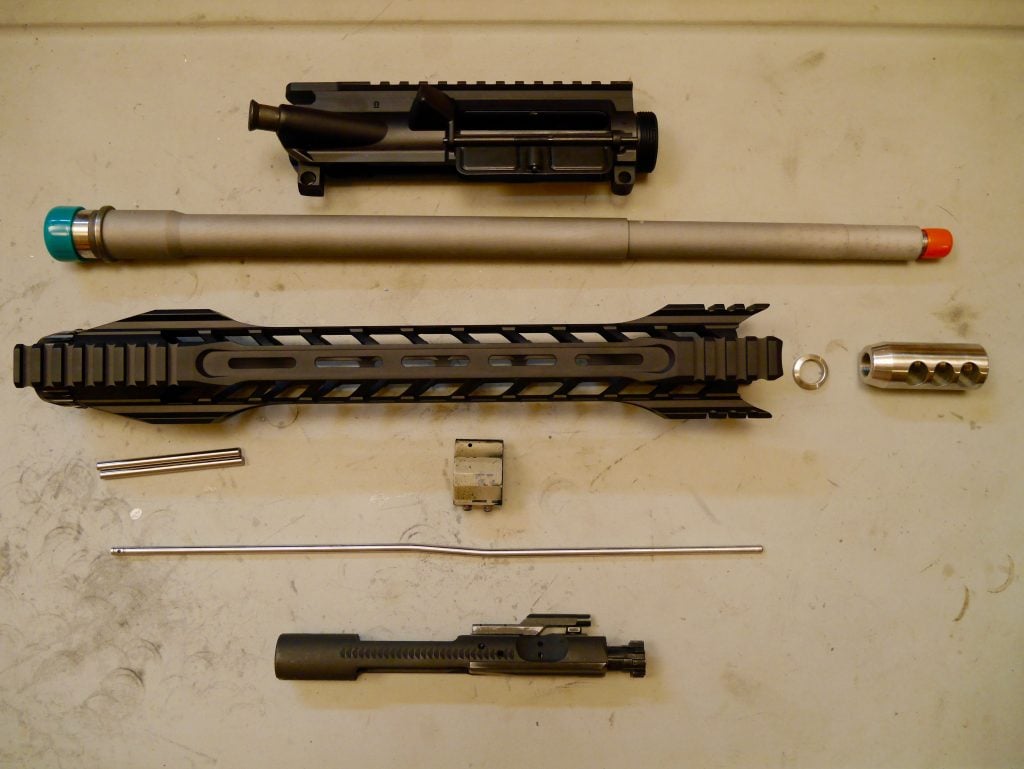
This build is an SPR (special purpose rifle) that is more purposeful around accuracy rather than weight and speed of the previous build. Here’s what we used:
- Aero Assembled Upper ($100): Now that you know how to install the forward assist and ejection port cover, I could use an assembled upper. My other suggestions for upper receivers.
- Rainier Arms 18″ Intermediate Length .223 Wylde Ultramatch Barrel ($380): I chose what has a great reputation for customer service and precision. The longer barrel gives rounds more velocity, while the intermediate length (between mid and rifle) gives an even softer shot, and the Wylde chamber brings some more inherent accuracy. Expensive but should be worth it…see their in-depth review (coming soon).
- Intermediate Length Gas Tube ($13): Match it with the barrel gas system.
- Fortis Night Rail 14″ ($250): Decided to complete it with a matching Rainier rail since it looked so cool. Going with the M-Lok version and 14″ so I could get some extra length out there for my bipod.
- Atlas Bipod ($200): Best of the best…but not shown above.
- Seekins Adjustable Gas Block ($60): My previous go-to before I discovered Superlative Arms. But still works great although a little annoying when changing the gas amount.
- Bolt Carrier Group: An extra full-auto weight one I had lying around. This build is not for running and gunning so a “normal” one will suffice.
- Competition Muzzle Device ($20): I got a stainless version to match that has three ports on the side and 2-3 ports on the top. If you want to go name brand or something other than compensators, check out Flash Suppressors, Compensators, and Muzzle Brakes.
Let’s see the build differences!

This handguard has a different kind of barrel nut but comes with its own tool still. Bust our your torque wrench and tighten it to 35 ft/lb a couple of times.
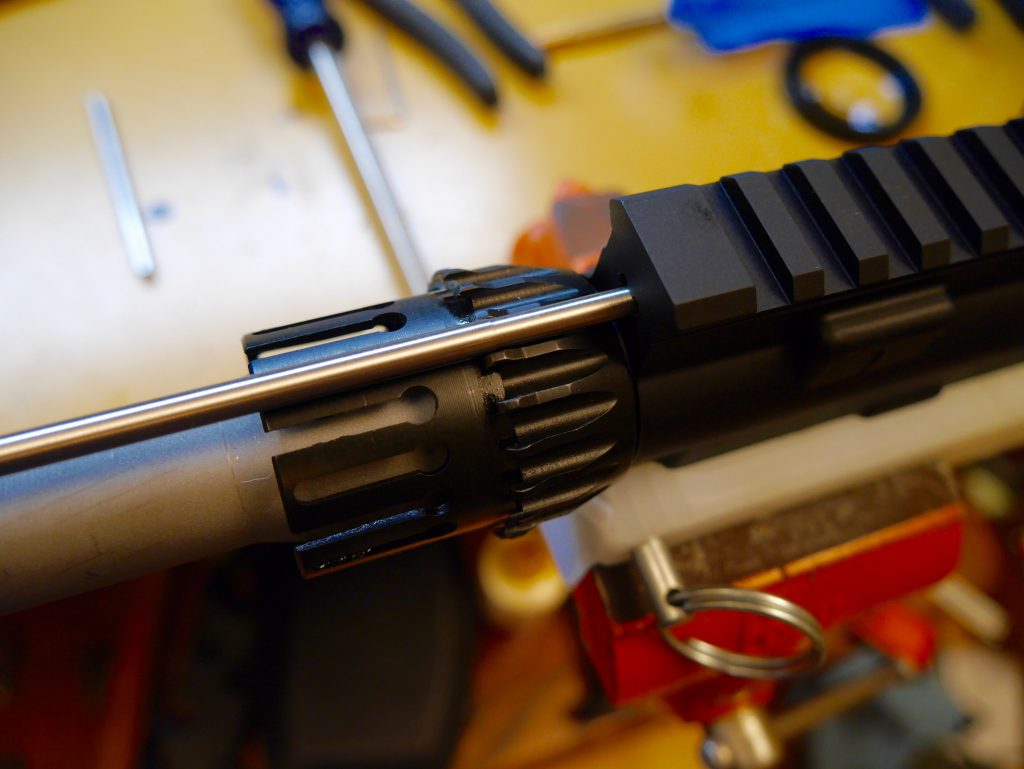
However, this handguard has the dreaded gas tube alignment notches. When you tighten up for the last try, use the gas tube to make sure it’s coming out straight.
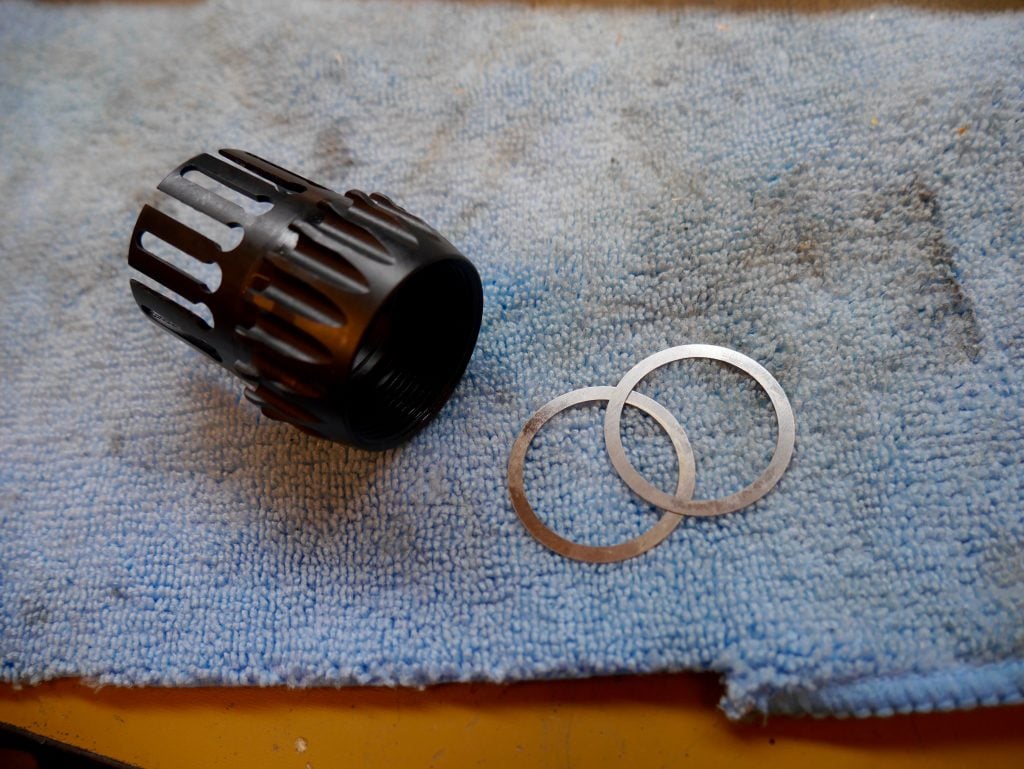
If you’re going over 80 ft-lb or under 30 ft-lb to make it work…you will need to use barrel nut spacers. Simply slide those on in front of the barrel nut and the thickness difference will make it work.
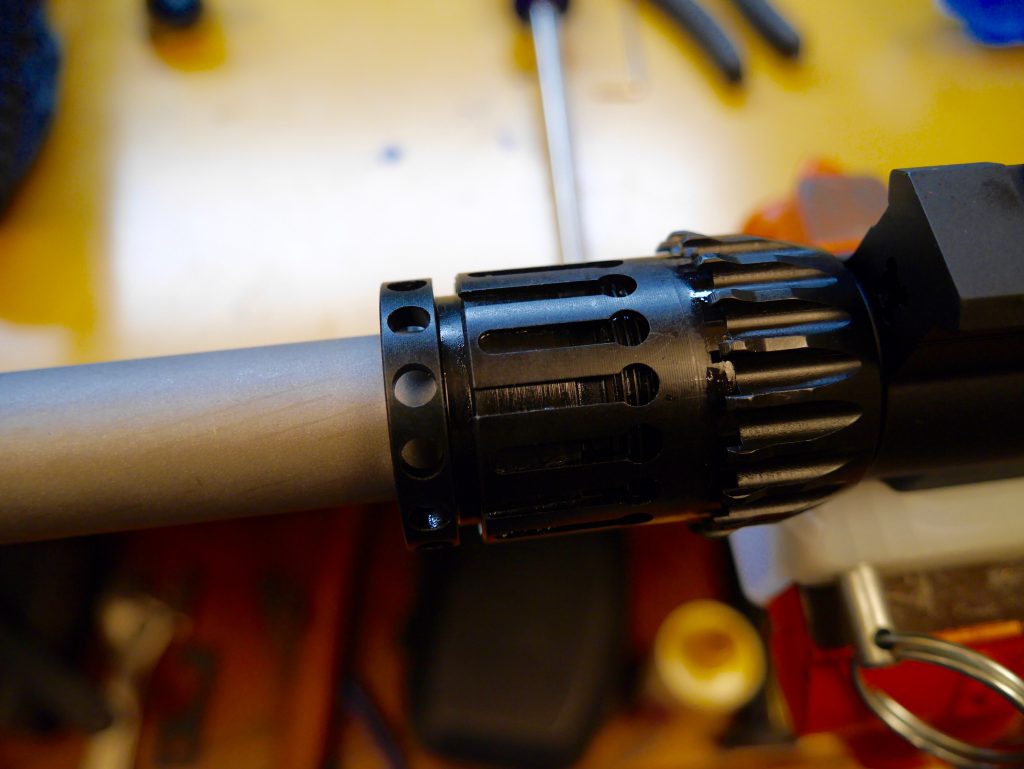
There’s a second part that goes into the barrel nut so start threading it on before the gas block. This is what allows for tightening of the handguard at the end.
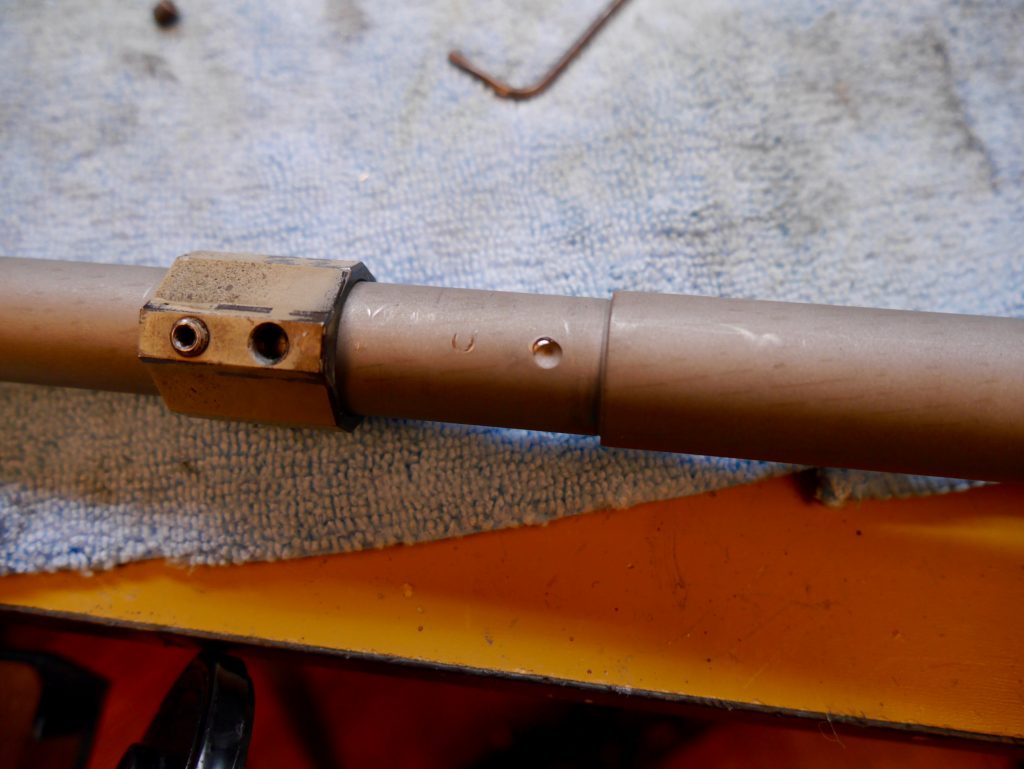
I like this barrel since it is dimpled already so that’s why I paired it up with a set screw kind of gas block instead of the clamp one in Build #1. I double-check that it’s going in there by first lightly screwing the end screw onto the barrel away from the dimple and noting the depth. Then I move it over the dimple and screw it in while making sure the depth is deeper.
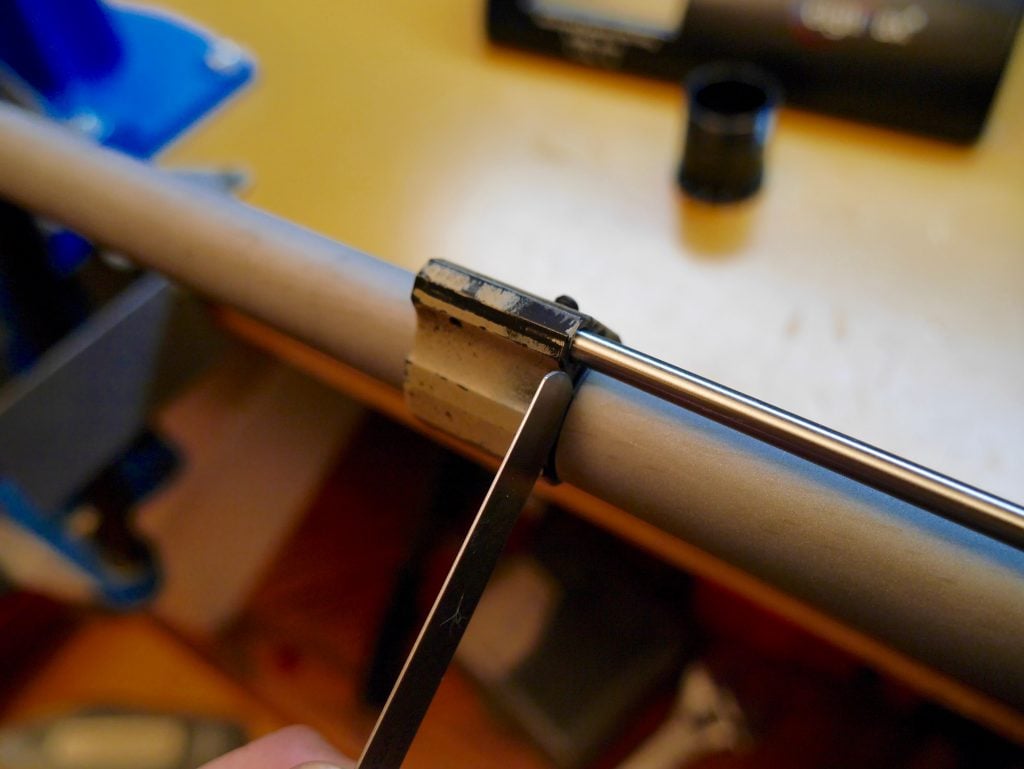
You can also get away with not using feeler gauges since the screw will fit into the dimple but if you have a clamp gas block or just want to double-check.
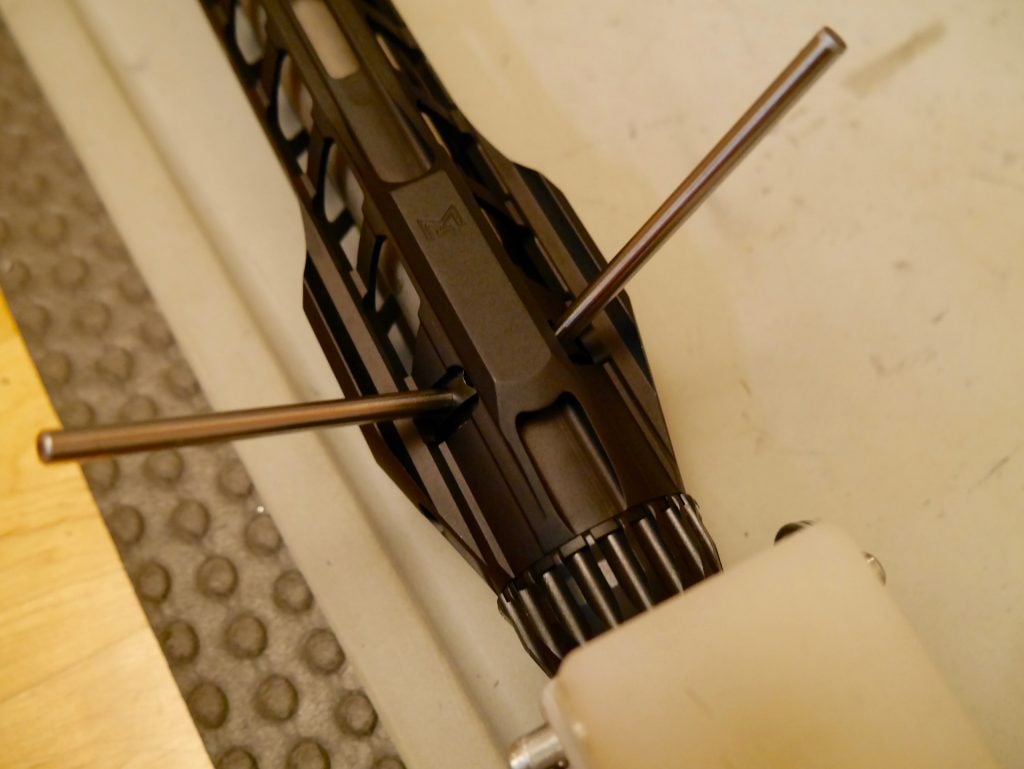
This is definitely atypical for handguards. But remember that the second nut…you tighten the holes with the two included rods. This makes the handguard stay put.
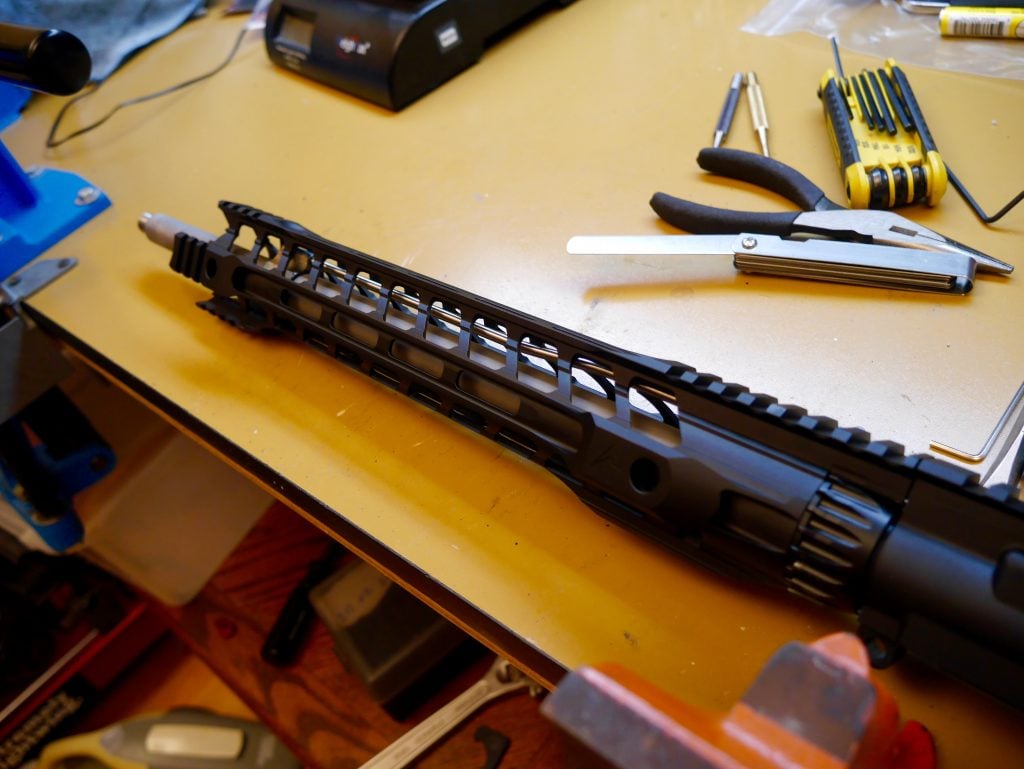
The completed handguard!
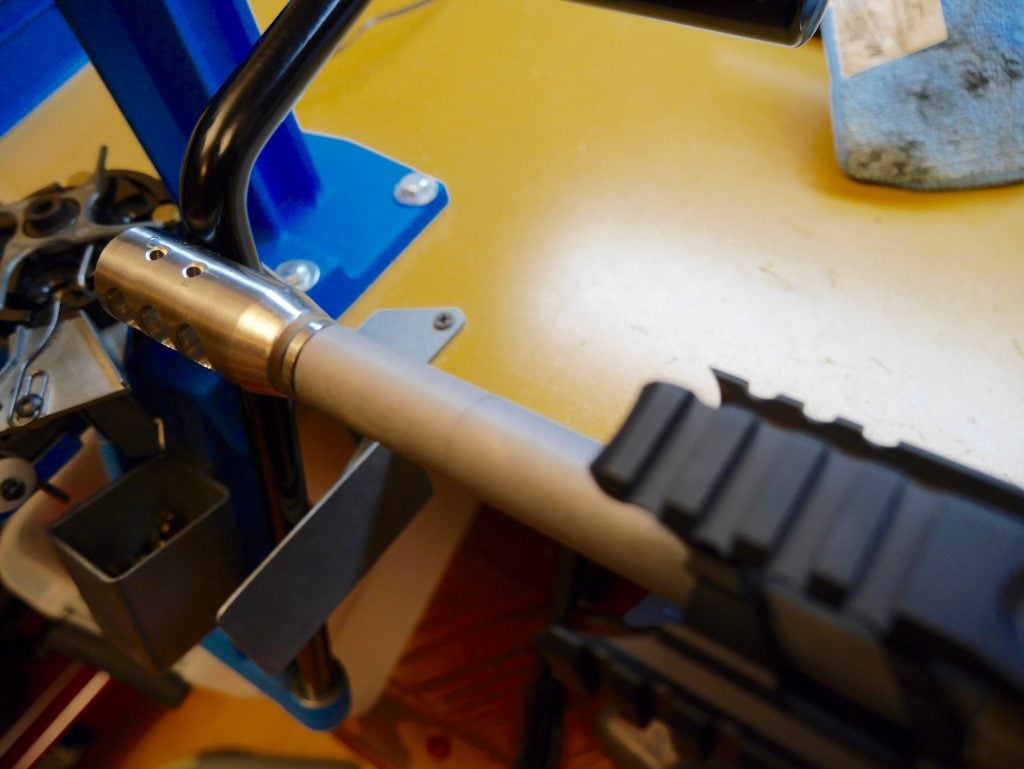
Same as before…I recommend using a screwdriver through the larger ports.
Otherwise, a more name brand muzzle device will have straight edges for a wrench.
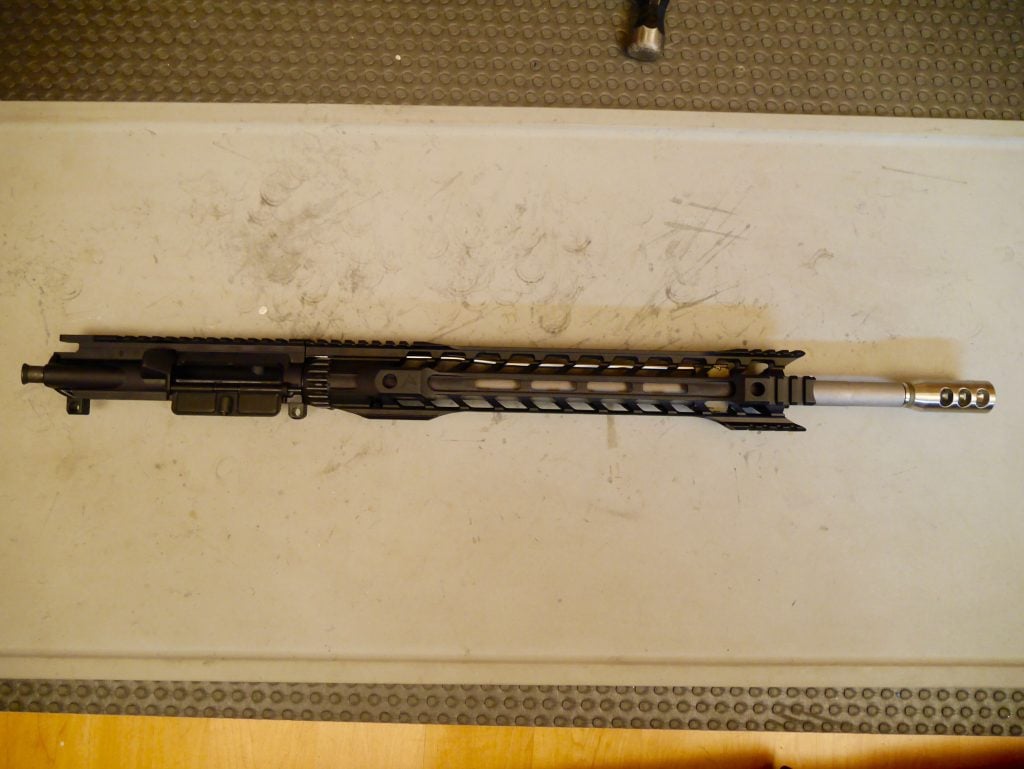
Done! See the awesome shooting groups (coming soon).
Conclusion
That wasn’t so hard right?
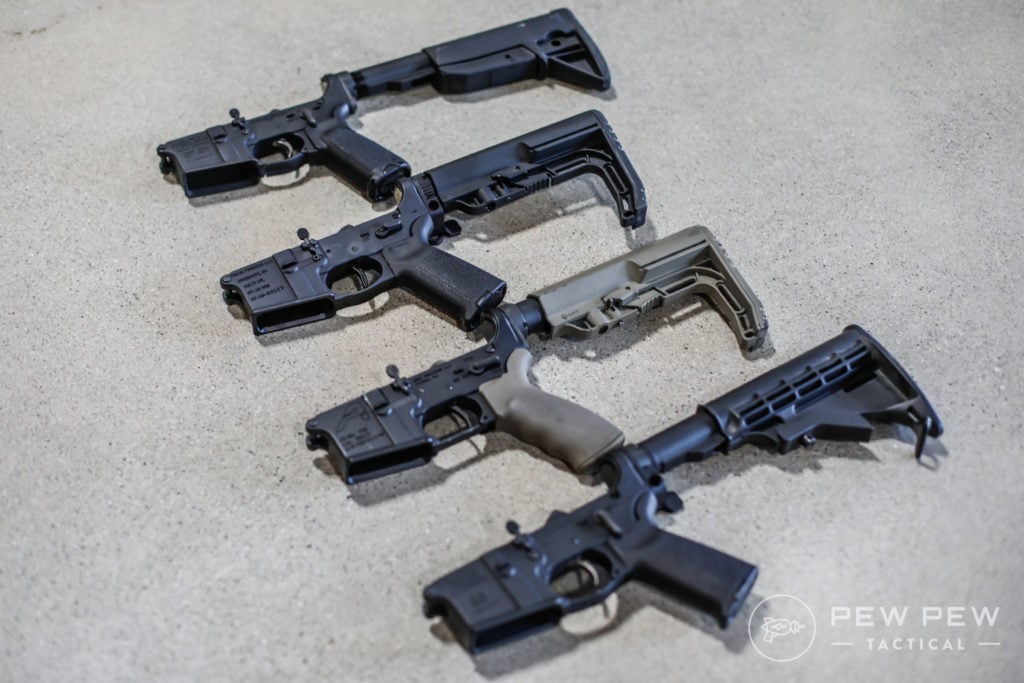
Pair it up with our How to Build an AR-15 Lower and you’ve built an entire AR-15 by yourself!
If you’re ready to choose all the parts to make your AR-15 perfectly suited to you and your objective…check out the rest of our AR-15 Definitive Resource or for more detailed instructions, check out How-To Install a Handguard and Gas Block.



40 Leave a Reply
Dude quick story. I have a friend that told me if I buy the parts he would help me put it together. So I bought a complete upper ,lower assembly,and a stripped lower receiver. I have been waiting for a time to meet up with him but between his work schedule and mine it has sat... Tonight I figured it's time to just go for it. I found this page and it has been great . You did a great job explaining everything. I just finished my build and now I want to try it out! Thank you !!!
You sure glossed over the bcg and charging handle install…
Any reason to use loctite on any parts in both the upper or lower build?
Thanks!
I use a dab of blue on anti walk pin screws, scope rings and trigger guard screws. Those are things I don’t plan on loosening anytime soon. All others crews I don’t because I switch parts like rails and grips often.
Do you have an updated list ?
Hey Eric, why not run a KaliKey and turn your carbine into a bolt action rifle in order to keep your standard grips and normal rifle features?
The KaliKey has a very limited application and almost always sacrificing semi-auto capability is not a trade-off that is worth it.
These are the worst directions ever. You say one thing that’s the easiest part of the whole build but then the next is the hardest and you say to just slide it right in? Serious? I need more help, someone that’ll actually explain every single step
dont be frustrated, from the stand point of pictures and description its pretty good.
there are a couple things on a complete build that over time you will see , for example the front pivot pin, some days it goes together so fast and easy you wonder what went wrong and some days your launching pins and springs all over the place. the best way i learned is to just hand tight everything take it apart a couple times and visualize the steps in your mind until you can do it without instruction then put it together. its almost more fun to build than shoot. so i dont mind taking them apart. the first build is the frustrating can't wait to get done build. but dont rush it you will find almost everything just slides together that's why the ar platform is so popular.
good luck
Thats not an A2 upper.
Too many pliers here that damage the finish of the parts. There is a better way.
Get yourself a set of role pin punches. It'll keep the pins from buggering up on the ends and help with not marring the finish of lowers and uppers. Also a smooth jawed needle nose plier will keep the pins and such you grab onto from getting burred. Great write up and pictures. Nice job!
Being fairly new to the ar platform,I first bought complete rifles and learned what I could do to customize them which I did.Then moved on to build kits and totally enjoyed the process.Now having several firearms AR platformed and enjoy them all the next evolution is to build a custom upper.Love your knowledge and input as this is one of my go to sights for info.And by the way , Installed a Superlative gas block on my PX 10 . It can either restrict gas or vent it depending on adjustment .It is my understanding that you want to vent when running suppressed correct me if I'm wrong. Yes it's a pain to adj.
Great guide and fantastic information! Thank you!. As an European who travels frequently to the States, and stares in envious anger at your access to weapons (I'm kind of a libertarian guy...) I wonder(asking for a friend) whether someone visiting could order the legally accesible components online (have them delivered to a Hotel) and carry them back to Europe without much hassle... of course my friend is aware that assembling them back in Europe would probably bring him trouble, but he's kind of adventurous... Anyone knows if my friend's designs are feasible?. Thank you in advance for your feedback.
Your "friend" could always just buy the parts locally...most gun shops/sporting goods stores stock them. There may be an issue shipping to the hotel.
Hey guys, great writeup. I have built several lowers but no uppers thus far. What I really want to do is install adjustable gas blocks onto 2 overgassed rifles that I have. Could you possibly make a video or picture guide detailing how to remove an existing factory gas block and replace it with an adjustable? I haven’t found a good, reputable online guide and am a bit nervous about proper alignment, placement, etc. thank you!
Great idea for an article! We'll take a look at that.
For now though: it's a lot easier than it seems like it will be.
This is the video I used when I did my first gas block, hope it helps you!
Hi, Great guide, like your lower guide, they both helped me a lot!!!
One thing I found that helped me put the spring on the ejection port door you may want to add or try next time. I did it exactly like you show except you have the rod longing 1/2 way in from right to left towards the right stopping before the spring space. I did this too but I used a wood rod (any rod approx the same diameter of the rod with the c-clip on it will work). I put it through the left side and a little more than half way through the spring. this way the spring and door are supported and lined up for when you push the metal rod through.. the metal rod will push the temp rod out as you go. this was the only way I could get it and I got it on the second try.
thanks again for the guide's!!!
Hi Eric,
Re: Barrel Nut Lube
A Mechanical Engineer once told me to NOT lubricate the threads. Threads work with static friction, The friction against your torque actually micro-welds the two threaded parts, Oil prevents the friction and micro=welding, Easy On also equals Easy Off.
I like the idea of torqueing and uninstalling the barrel nut a few times to remove any high spots on the threads. Then torque the barrel nut on and let the micro-welds do their work.
Excellent write-up, BTW.
Your friend isn't wrong about the micro welding, but that is the exact reason why most armorers use grease. The micro welds will produce a stronger fit, however a fit that strong isn't necessary and often prevents re-barreling.
I have an armorer friend that works on mostly high-end precision ARs, the #1 issue he has that turns a $300 re-barreling job into a $1,000+ re-barreling job is when he can't get the barrel off due to no grease being used and he has to literally cut off the barrel nut using a Dremel.
Trust me, if you ever want the hope of changing out your barrel - grease and a reasonable amount of torque is your friend.
Thanks, David. I'll go with the common industry practice and use grease. Cheers.
As a structural engineer, I am guessing you dozed off during your friend's classically extended discussion of torquing on fasteners. It is a complex subject, far more so than would normally be expected. Normally it is best to go with experience in such a matter unless you have a 1000 manhours to throw at it. One tip is is that non-lubricated fasteners are less prone to loosening, although vibe will back out any threaded fastener without a locking feature given time. This likely a good reason to go with the notched nut so the gas tube can act as a locking feature. Although comments from the gunsmiths indicate loosening is not an issue even with lube.
If the torque level is truly important, the nut should be retorqued 24hr later. We do not understand why, but joints relax over a day's time. So for a tighter joint, try retorquing the nut the next day.
Just built my first lower with your assistance, I just wanted to thank you. Your pictures and directions were spot on and easily understood by an old guy such as myself. I’ve an upper to build next and I will be visiting your sight again. This one I want to set up with a Vietnam look to it. Thanks again!
You're so welcome, Russ!!
They you for such an informative piece. I was currently wanting to build a .50 Beowulf upper. Have you made one before? If so would you mind sharing what parts you used for that build? If not, what parts would you use to build a Beowulf upper? thanks for any help you can offer.
Hey Jakob, I have not yet...but Adams Arms might be a good place to start.
Great guide. Both this one and the lower build! Just as a note, the handgaurd you are using is not by Rainier Arms. It is manufactured by Fortis Manufacturing (Fortis Manufacturing, Night Rail)... might be worth an edit.
Thanks for catching that, Derek. Fixed!
Do you have a complete parts list to assemble a complete ar?
If you combine this Upper Receiver article with our Lower Receiver article, it should give a good complete list. But otherwise...great idea for a future article!
You may want to update the section about barrel nut torque. It states in. lbs. when it should be ft. lbs. Don't want people's barrels and handguards falling off of the front of their rifles!
Great guide and site, by the way!
Thanks Christoph, thought I changed it in all the places but guess not!
EXCELLENT!! very good narrative; pictures are clear and definitive. No guessing required. Thank you.
You're welcome Darrell! Glad we could help you build out your AR!
Eric, is checking head space a must do step with a new build? Love the articles, very informative. Thank you.
It's always recommended! It's pretty rare that modern well-known manufacturers will have headspacing issues...but having a "field" gauge is a good final check.
My ? Is how loose or tight should the BCG fit into the upper receiver. I ask because I really hope I didn't make the upper out of round. It fits in great however it doesn't slide back and forth by turning from one end to the other. It does move smoothly though. Just afraid I f'd it up by putting in Vise using rubber instead of waiting for my vise block to come in.
Nice pictures and info. Easy to see and understand. Thanks.
Thanks so much Richard!