
If you’ve been on any social media page devoted to the AR, you’re seeing a lot of hype over 13.7-14” barrels lately. The hype is real. It’s a versatile length for an AR for multiple reasons.
But why would someone go with that size of barrel?
How can you run a sub-16” barrel with a stock, and not have to worry about NFA legislation and the $200 donation to the crown?
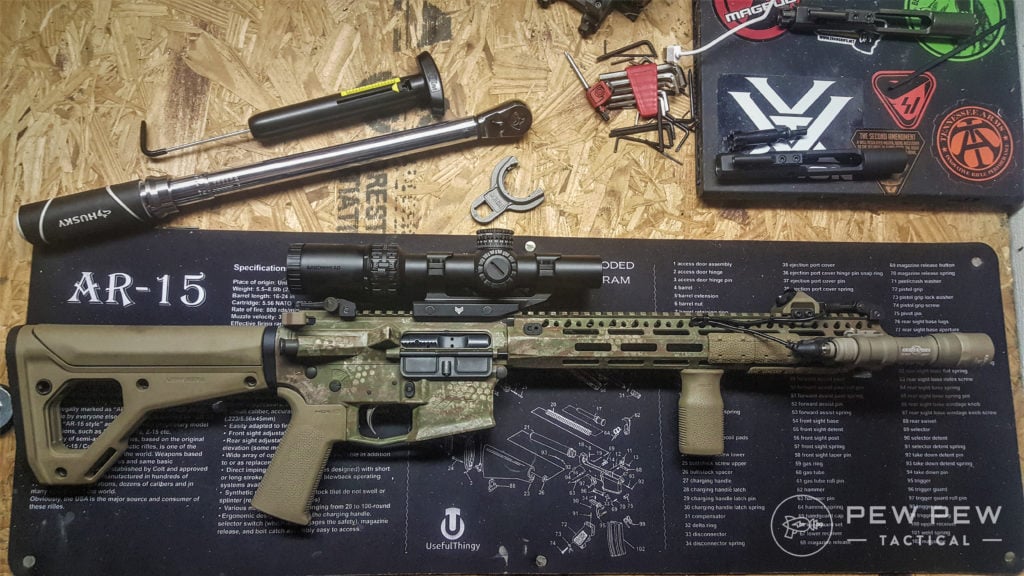
Let’s dig into my new favorite build, all the DIY “gunsmithing” options I performed, and how to pin and weld a muzzle device to bypass unconstitutional gun legislation like the National Firearms Act.

Table of Contents
Loading…
Reasons to Go Short
First and foremost, why go under 16” of barrel?
Simple.
Shorter is lighter, handier, and with a permanently attached muzzle device, you can keep the overall length of the barrel to legal minimum lengths. Velocity is still effective for a 300+ meter carbine as well.

A 16” barrel with a typical muzzle device adds length to the rifle overall. It may not seem like much, but shaving off 2”+ is noticeable when handling a rifle.
With a shorter handguard, it makes the rifle balance well while using a thumb over bore grip with your support arm.
With the plethora of muzzle devices on the market that doubles as a suppressor mount, you can permanently attach a muzzle device to add overall length to a barrel that is 13.7-14.0”. The SOLGW NOX, the Dead Air Flashhider and Brake, and FCD options are just a few that will work.
If you plan on using a can on your rifle, this efficiently keeps the overall length shorter since most QD cans have the muzzle device inside of the blast chamber. For example, running a Sandman S becomes more manageable than a 16” barrel with a Key Mount from Dead Air.
The Barrel and Gas Block
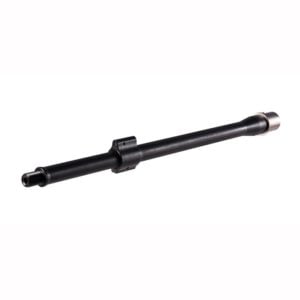
The barrel I chose for this duty level blue-collar build was a Ballistic Advantage 14” Hanson profile in 4150 CMV steel.
The barrel has a QPQ (nitride) finish with a FailZero nickel boron coated M4 barrel extension. It has a carbine gas length and comes predrilled to pin the gas block that is included.
Prices accurate at time of writing
Prices accurate at time of writing
-
25% off all OAKLEY products - OAKLEY25
Copied! Visit Merchant
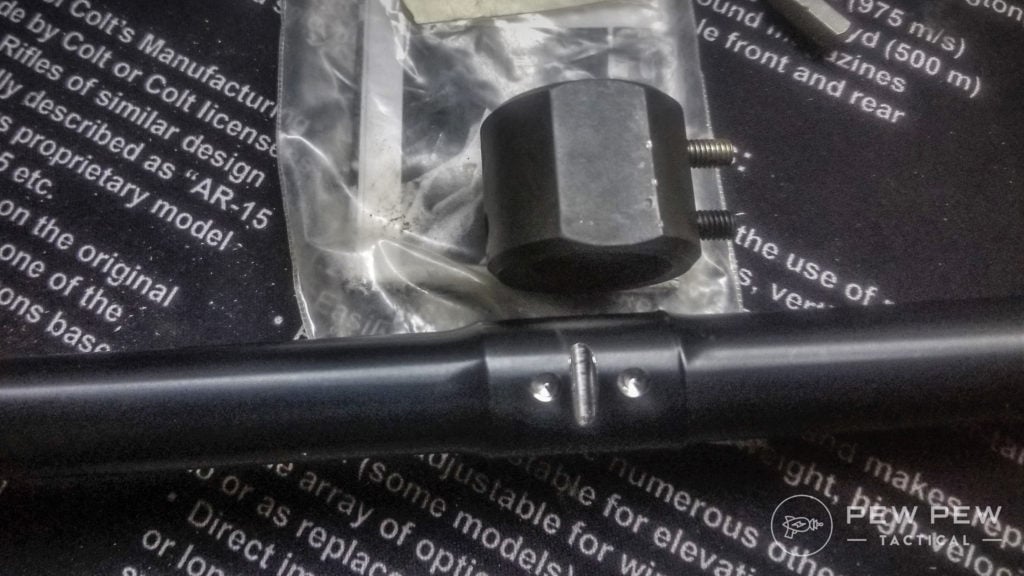
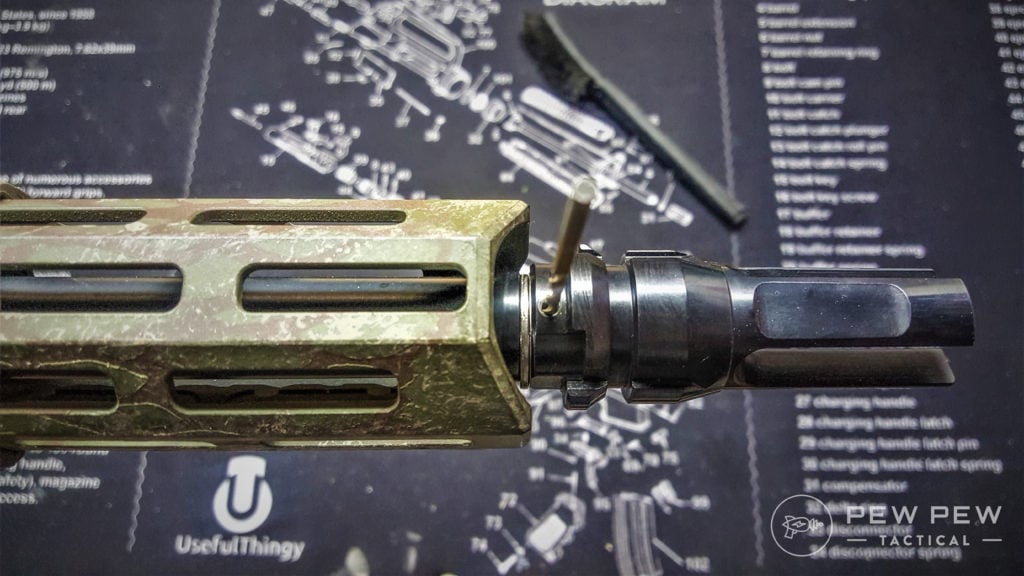
Speaking of the predrilled and included gas block, I decided to take it a step further.
While the included roll pin would serve well in fixing the gas block to the barrel, I typically can’t leave well enough alone.
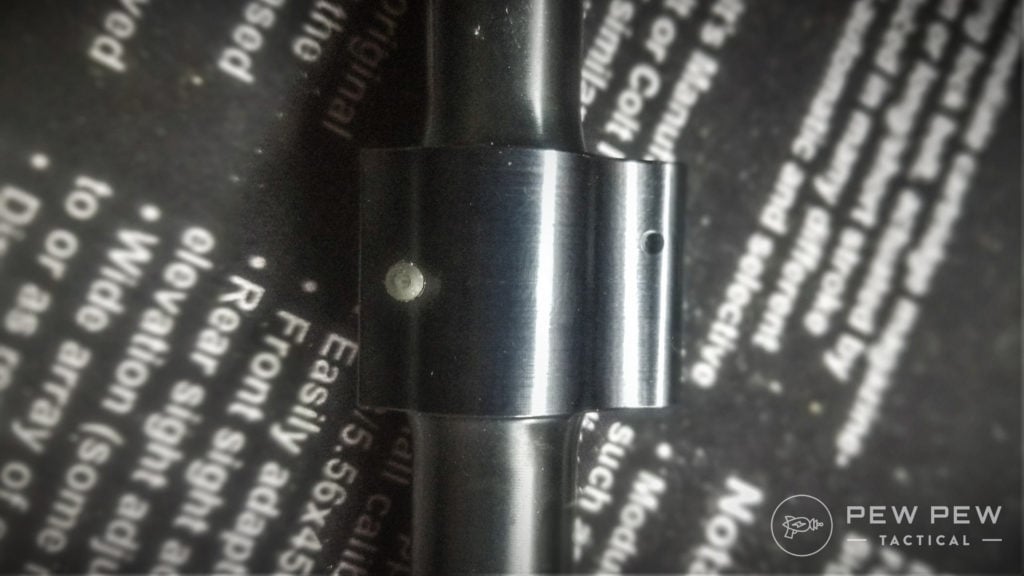
I decided to dimple the barrel for the gas block set screws and ream the drilled hole out with a 2/0 taper pin reamer. It’s easy to do with the jigs I purchased from Black Rifle Engineering.
Prices accurate at time of writing
Prices accurate at time of writing
-
25% off all OAKLEY products - OAKLEY25
Copied! Visit Merchant
If you build a few rifles, they are worth adding to your gunsmithing tools and make the process quick.
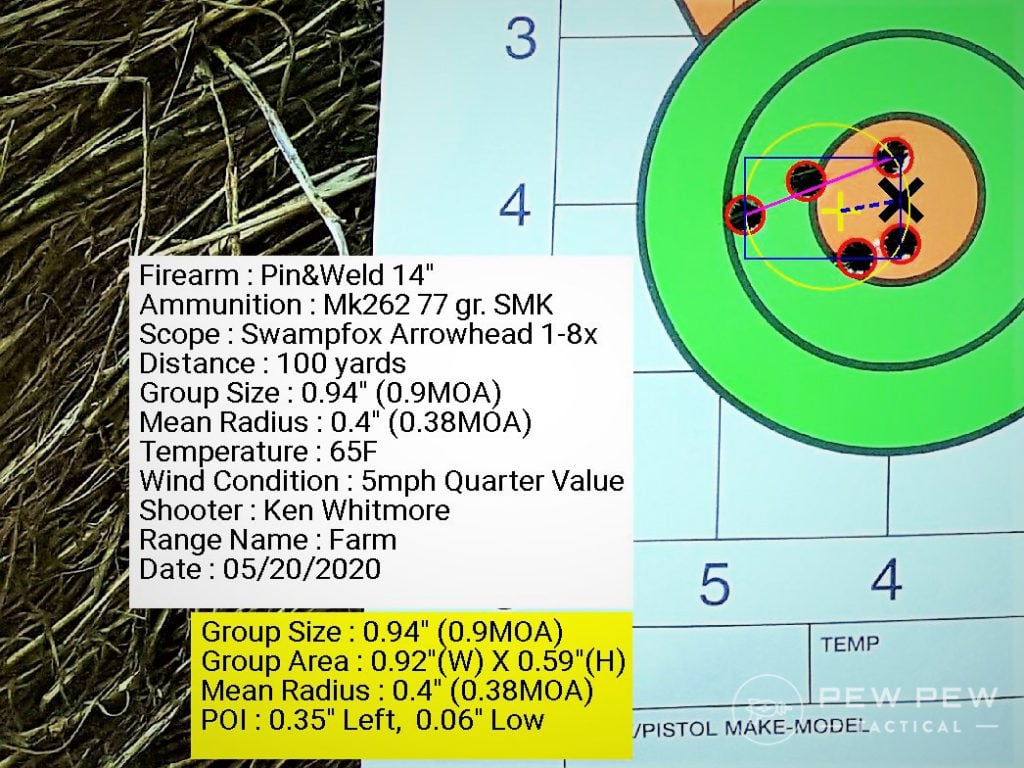
Like most BA Hanson barrels, accuracy is everything you’d expect. Its typically a sub-2MOA barrel, and when I do my part with match grade ammunition, the rifle will shoot consistently 1 MOA or under. It happens to prefer Mk262, and Remington 62 grain BTHPs.
The Pin and Weld
The dimpling didn’t end there.
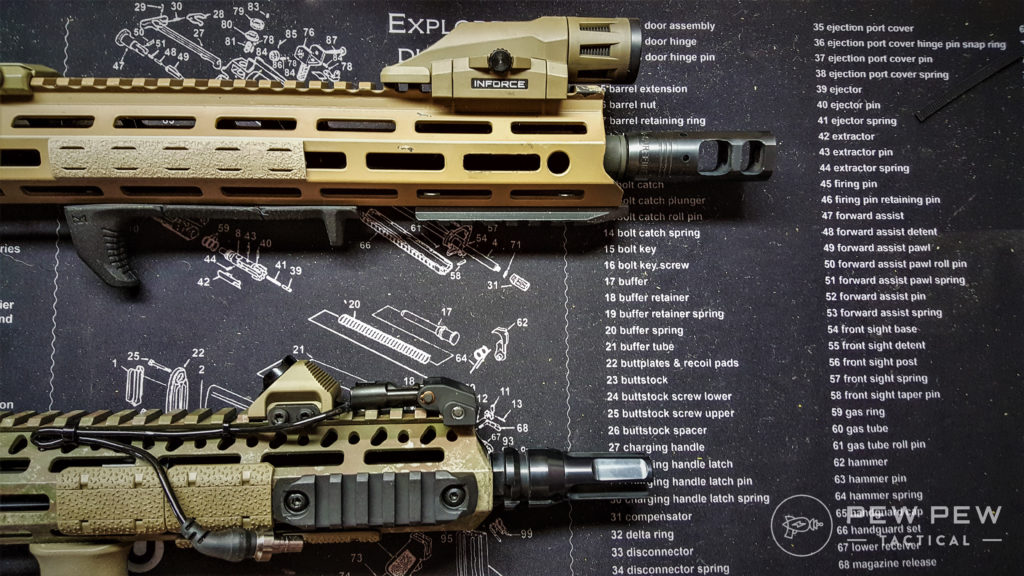
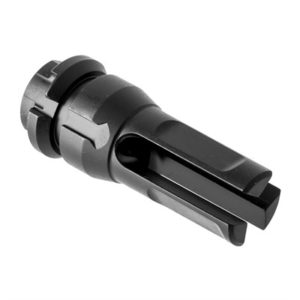
To make the 14” BA Hanson barrel legal to use with a stock, I needed to make the overall length at a minimum of 16”. I decided to go with the tried and true Dead Air Key Mount Flash Hider.
Prices accurate at time of writing
Prices accurate at time of writing
-
25% off all OAKLEY products - OAKLEY25
Copied! Visit Merchant
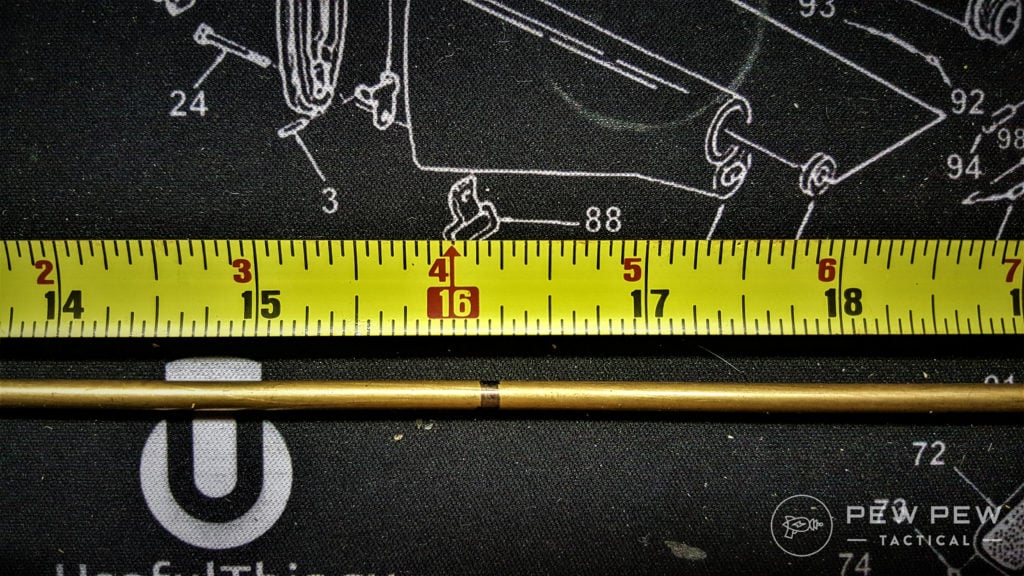
Before anything else is done, you need to verify that the overall barrel length is at least 16” to legally be a rifle. To measure the overall length, you must install the muzzle device and any shims needed for proper timing.
A simple cleaning rod pushed up against the bolt face and marked with a marker can give you an accurate measurement to verify a 16” overall length.
This is the ONLY WAY to measure overall length per ATF guidelines.
It must be measured from the BOLT FACE. Mine happened to measure at 16.125” with the shims.
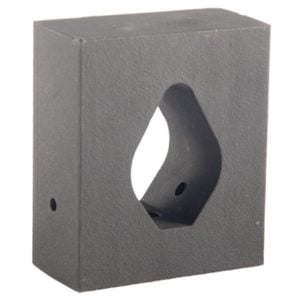
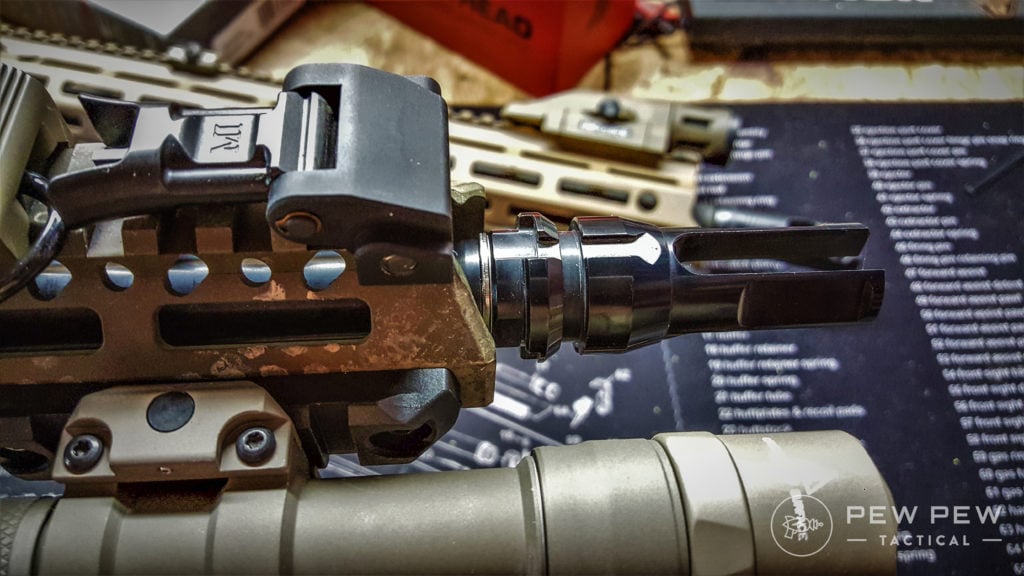
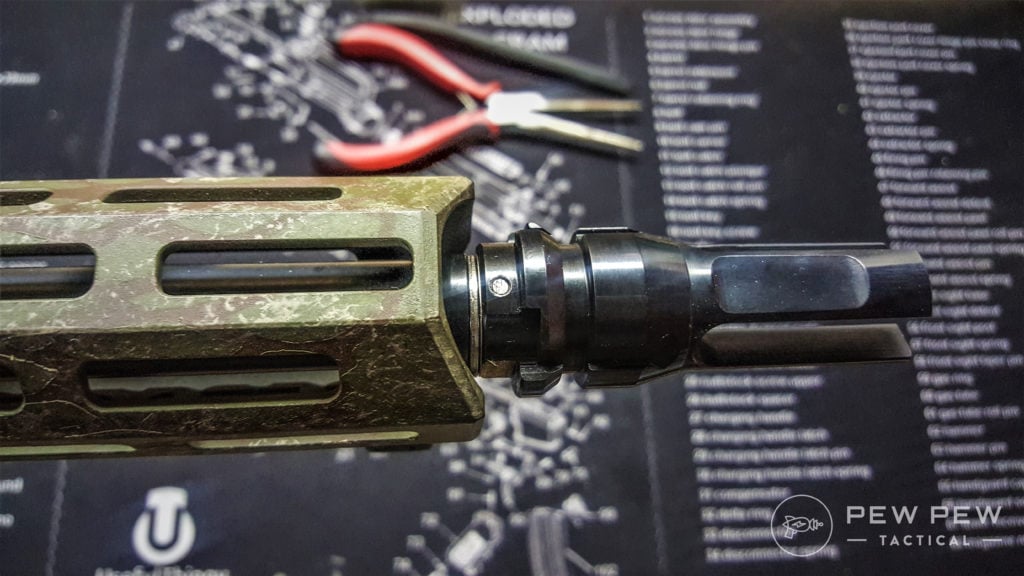
The Dead Air FH has a hole predrilled at the bottom of the muzzle device specifically for pinning. It is also sized perfectly to use a takedown pin detent to act as the pin.
The detent works perfectly since it is beveled, and you will need to dimple the threads of the muzzle for the pin.

Dimpling the threads of the muzzle should be done slowly and methodically. The last thing you want to do is punch through the muzzle and create a hole. Just like a golfball, you only want to make a small dimple in the material for the pin to properly lock into place.
Once you have dimpled the barrel’s muzzle, all that is required for prep work is to size the pin. Dropping the pin into the hole will give you an idea of how short it needs to be. It’s a good idea to take a hammer and give the pin a few taps to make sure it’s fully seated into the dimple.
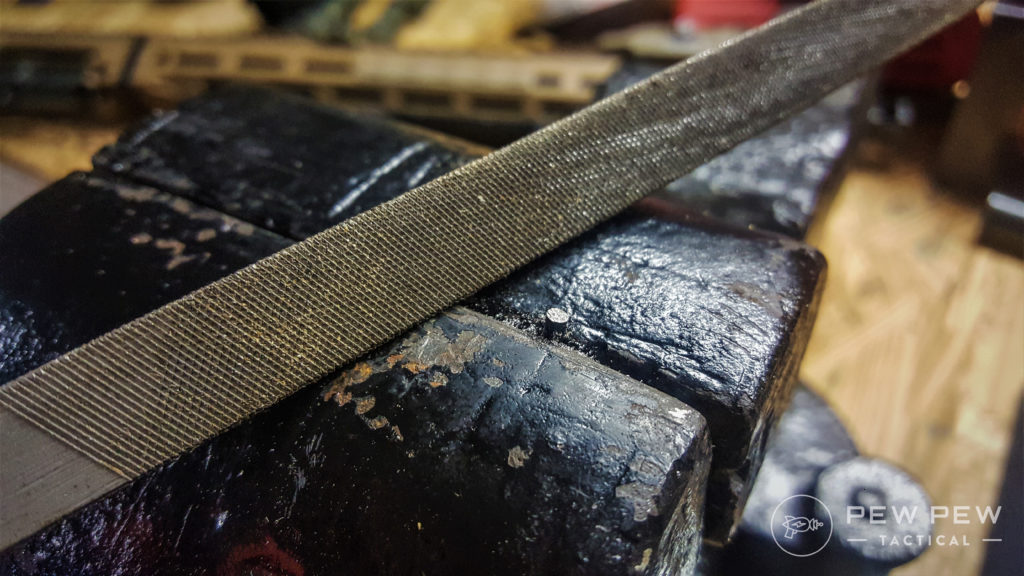
After marking for a cut, you can either file the pin down or use a small cut off wheel. I took my time and filed the pin down for a proper size. It takes a little extra time, but it makes for a perfectly sized pin for your weld. You want the pin barely shorter than flush with the outside of the muzzle device.
I would also recommend countersinking around the hole. This allows the weld to pool which gives a cleaner look and won’t require as much grinding or clean up. I am by no means a welder, so I still cleaned the weld up a little. Some cold blue, or even some spray paint, will protect the exposed weld.

For an excellent resource, check out IraqVeteran8888’s channel. They go through step by step on how to properly pin and weld a muzzle device, which helped me out a lot.
There are other ways to permanently fix a muzzle device. I prefer a pin and weld, but you can also silver solder the threads, or weld the seam where the muzzle device meets the shoulder of the barrel towards the muzzle.
Receivers and Handguard
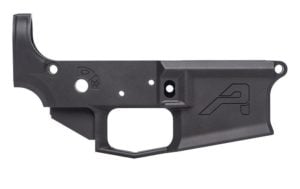
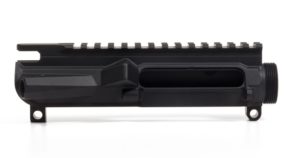
To stick with the blue-collar approach, I went with an Aero Precision M4E1 receiver set. I have yet to be disappointed with these receivers and they look great. When these receiver sets go on sale, it’s a great value for a budget-minded AR build.
Prices accurate at time of writing
Prices accurate at time of writing
-
25% off all OAKLEY products - OAKLEY25
Copied! Visit Merchant
The upper and lower receivers have a small amount of play between the two. It’s not enough to worry about, but a nice touch with the M4E1 lower is it has a tension screw to take out any slop between the receivers. I tightened mine up a little and it locks up like a bank vault.
Prices accurate at time of writing
Prices accurate at time of writing
-
25% off all OAKLEY products - OAKLEY25
Copied! Visit Merchant
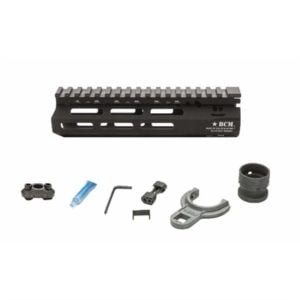
For my handguard, I decided to go with a 13” Bravo Company MCMR. It measures at 13.4” to the end of the flare of the handguard, which should work perfectly for a near flush fit once I finally buy a Dead Air Sandman-S.
Prices accurate at time of writing
Prices accurate at time of writing
-
25% off all OAKLEY products - OAKLEY25
Copied! Visit Merchant
BCM MCMR handguards just might be my favorite go-to handguard. Installation can be a pain because of the tight tolerances for fitment, but in the end, it gives a shooter an impressively solid handguard for almost any condition. The hardware and anti-rotation tab provide for a perfect lock up at the barrel nut.
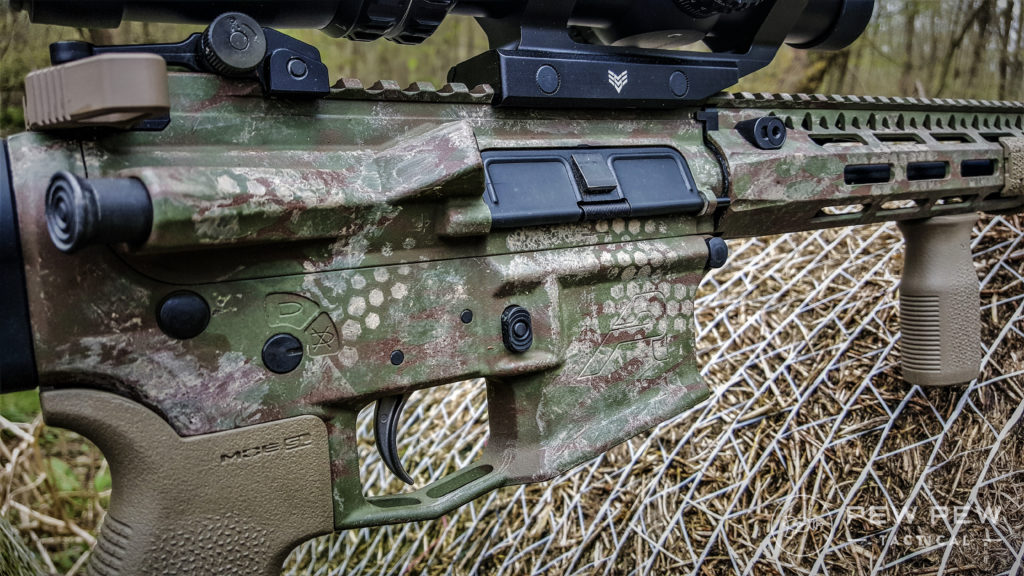
To finish off the receivers, I played around with some templates and did a rattle can job. The stencil I used looked like a mixture of reptile scales and tree bark. I thought it was too dark at first, so I used a honeycomb pattern with desert sand to lighten it up.
The Guts
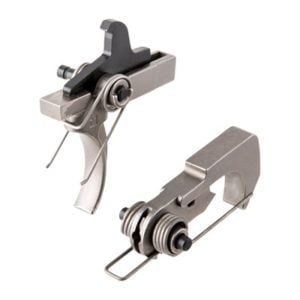
For a rifle you want to rely on, the guts are important. I went with a Sons of Liberty Gunworks Blaster Kit for all the small parts. Their detents and takedown pins are some of the smoothest I have used when building ARs. I chose a BCM PNT trigger and hammer and I have been happy with it at about 5.5 lbs pull weight.
Prices accurate at time of writing
Prices accurate at time of writing
-
25% off all OAKLEY products - OAKLEY25
Copied! Visit Merchant
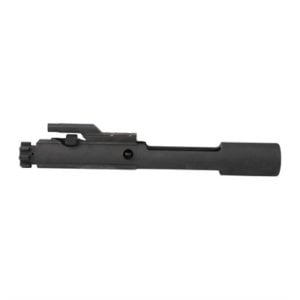
The BCG that I chose was a Brownell’s phosphate model that is individually HPT and MPI. It uses a C158 steel bolt that is shot-peened. After lubing it up, this bolt hasn’t missed a beat.
Prices accurate at time of writing
Prices accurate at time of writing
-
25% off all OAKLEY products - OAKLEY25
Copied! Visit Merchant
I even sent it to Instructor Chad of the School of the American Rifle. Check out his video!
Properly buffering a carbine length gas system is important. I decided to go with the best and ordered a VLTOR A5H2 buffer using a green rifle length spring from Sprinco. These two go together like peanut butter and chocolate.
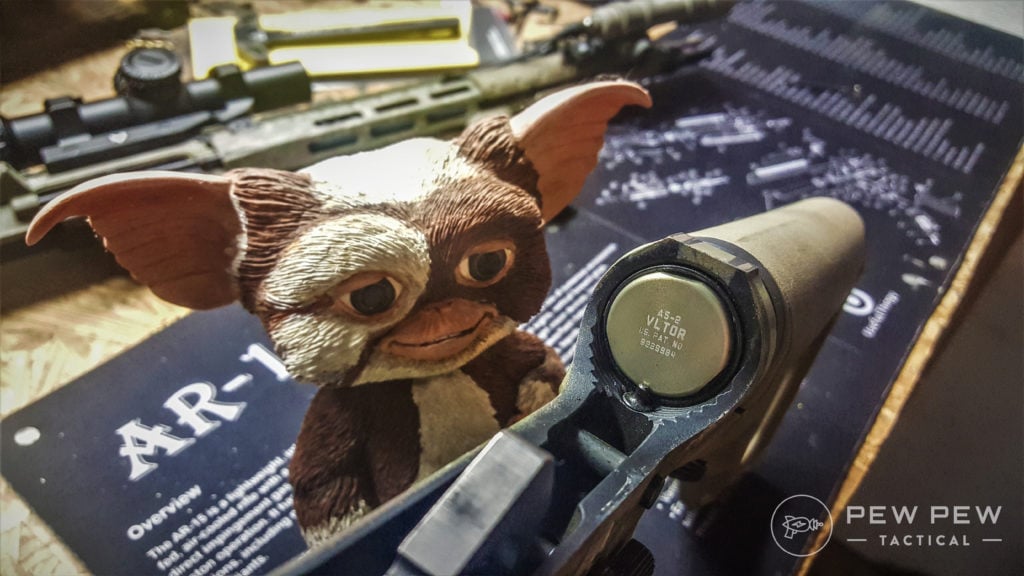
Overall, that pair housed in my Magpul UBR stock makes for a flat shooting rifle.

Prices accurate at time of writing
Prices accurate at time of writing
-
25% off all OAKLEY products - OAKLEY25
Copied! Visit Merchant
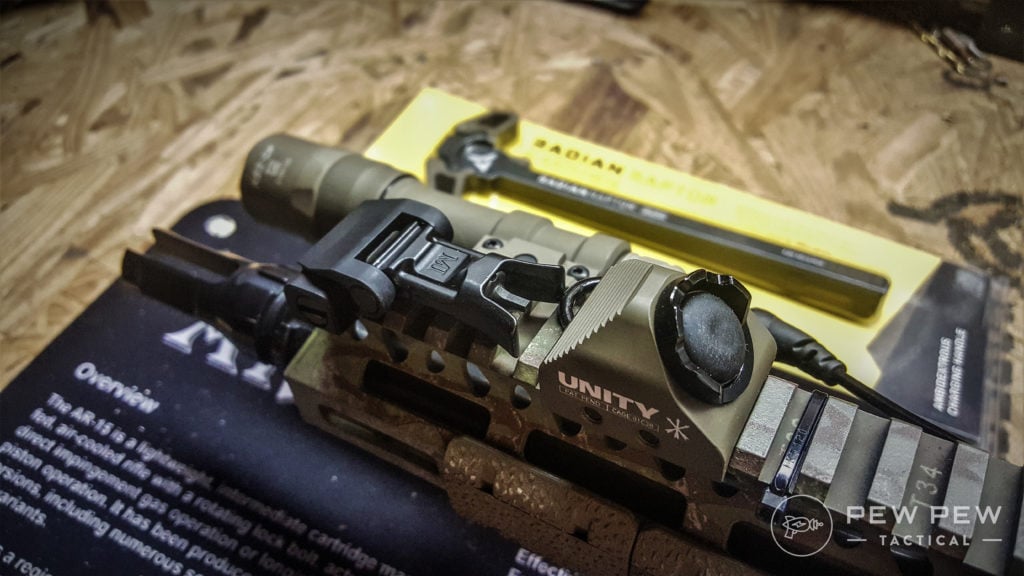
I went with a Radian LT charging handle. At this point, running a mil-spec charging handle just isn’t worth your time.
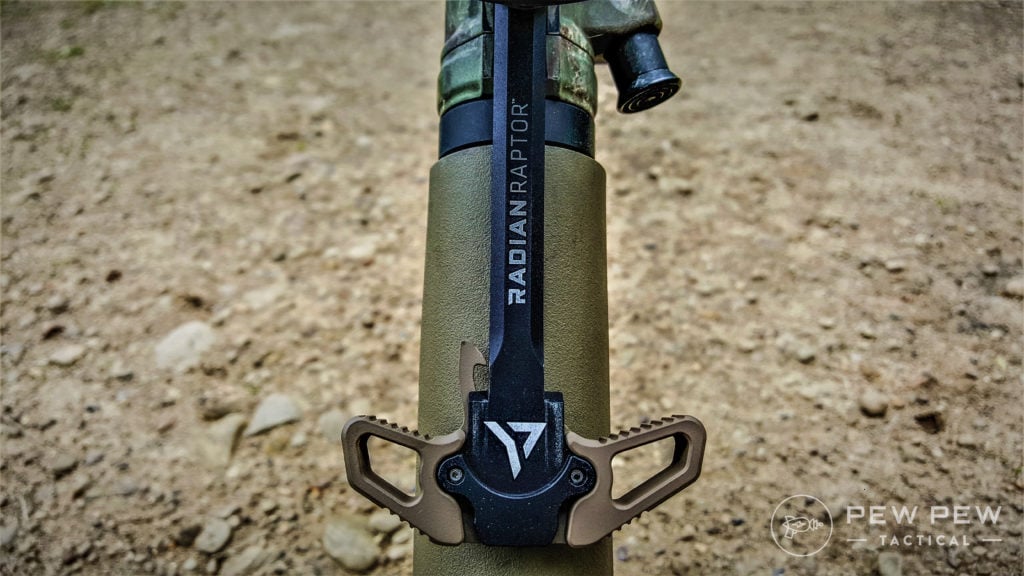
It’s 2020. We have all had a rough year so far. Treat yo’ self and get one of the best ambidextrous charging handles in the industry.

Prices accurate at time of writing
Prices accurate at time of writing
-
25% off all OAKLEY products - OAKLEY25
Copied! Visit Merchant
Duty–Level Upgrades
For a proper bang-around rifle, its settled science on three things to have on your rifle.
A weapon light must be mandatory for any defensive use.
You can’t shoot what you can’t identify.
An optic, whether red dot or LPVO provides a consistent aiming point regardless of lighting conditions. And lastly, a sling is like a holster to a handgun.
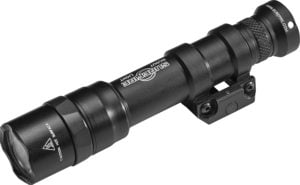
For the weapon light, I bought a Surefire M600DF with a Unity Tactical Hot Button from AR15 SafeSpace.
Prices accurate at time of writing
Prices accurate at time of writing
-
25% off all OAKLEY products - OAKLEY25
Copied! Visit Merchant
While you can get more candella with better throw from Modlite or Arisaka Defense, Surefire has been battle-tested and is an excellent light for defensive use.
Check out more of our favorites in Best AR-15 Lights.

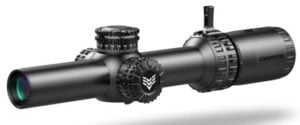
The optic I currently have on my rifle is the Swampfox Optics Arrowhead in a 1-8x. I tested, reviewed, and beat up the optic. Its FOV is excellent and works well on a defensive rifle set up with its bright reticle. Check out my review of the Arrowhead!
Prices accurate at time of writing
Prices accurate at time of writing
-
25% off all OAKLEY products - OAKLEY25
Copied! Visit Merchant
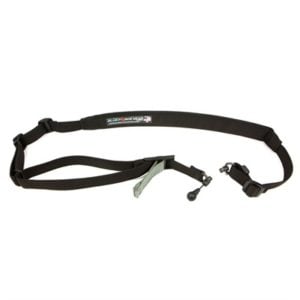
There are a lot of great slings out there, but I prefer the Blue Force Gear Vickers 2-to-1 Red sling. It’s quick to adjust, can convert into a 1-point sling if you like smashing your grapes, and comes with QD sling swivels. It’s simple, and that’s exactly why I love it.
Prices accurate at time of writing
Prices accurate at time of writing
-
25% off all OAKLEY products - OAKLEY25
Copied! Visit Merchant
Parting Shots
There are A LOT of great choices on the market to build your own blue-collar defensive rifle. These are just a few great choices to use.
Have you ever built a rifle for defensive use with a practical budget? Have you ever tried to pin and weld a muzzle device? Let us know in the comments below! Trick out your gat with the Best AR-15 Upgrades, stem to stern!


17 Leave a Reply
*What* camo pattern... sorry for that!
Wait paint/Camo pattern is that on the gun?! It's awesome!
Thanks
You guys need to try MK -TEK holsters before you profess beat holster. Talk to Todd retired Army Ranger. These folks make the absolute best custom Kydex holsters out there. Period Stop. Look them up
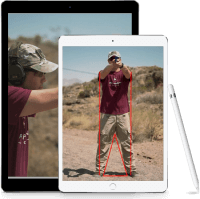
What app did you use for measurement in the shot group pic?
Range Buddy on android!
Using the links in the article, the parts for this build add up to US$1871, without shipping or tax. Just for info...
Oops. US$1851. I added $20 for magazines.
That's probably pretty accurate. Some parts I got pretty good sales on prior to the pandemic.
That doesnt take into account all the tools, jigs, and equipment I have bought to do proper assembly though.
To all of the experienced and non experienced Shooters out there flashlights are definitely a must but Olight is a company that's not heard of much yet but given time they will be one of the biggest companies to take over the gun crowd so being someone who's used Streamlight for over 20 years now I've switched to old light and only owe light and I think everybody should at least give them a chance I guarantee you you'll be more than satisfied with what you pay and you're going to pay a lot less and get a lot more for what you pay for
I hear ya. I paid around $250 for a Streamlight TLR-8G. It's nice and I like it a lot. It's tailored to fit a G19.
This week I purchased a Olight Baldr Mini and paid $100. Time will tell which is the better bargain. But the Olight has features that appeal to me: rechargeable battery, laser above the LED, not below, and instantly adjustable positioning.
This aged well.
Has your Olight decided to turn into an IED yet? :D
had a 14.5 pinned and welded, loved how it handled, looked and shot, rifle shot well, i did not. went bullpup and enjoy for the same reasons but no questions on welds and pins. nothing looks cooler than a 14 incher pinned and welded and loaded with gear....
I thought I'd find more information on pinning and welding a muzzle device. In NJ flash hiders are not permitted. Does anyone know who carries muzzle breaks or compensators that are predrilled for pinning?
You could always go with a Surefire Pro Comp. It has a pilot hole as well for pinning.
https://www.surefire.com/products/suppressors-division/muzzle-devices/procomp/
Or if you planned on running a suppressor, you could run the Dead Air Brake.
Also in NJ, I used a VG6 Epsilon 556SL on my latest build. It comes predrilled to pin/weld and is slim enough for a .750in gas block to fit over if you ever need to do gas block maintenance after its permanently attached. They also make a slim Gamma 556SL. There is also faxon with their slim muzzle breaks that are the same diameter as a pencil barrel (.625in) though I'm not sure if they come predrilled
For about $1000, I just built an AR-15 for the range (which will stay in the bedroom) using an Aero Precision 14.5" barrel, and I had a VG6 Gamma 556SL pinned and welded on it. I went with an Anderson upper/lower, PSA M16 nitrided BCG, PSA 2-stage trigger, Aero Precision H1 buffer, BCM 4B charging handle, Smith & Wesson RM-10 light, Bushnell Tac Ops Big D red dot, and a Magpul MS4 sling. The handguard and LPK/UPK are BDU parts, the stock is a Magpul STR (pinned), and I run Magpul MBUS for BUIS. I have an Aero Precision gas block, MFT grip, PSA anti-walk pins, and PSA rifle bag to round it out. Unfortunately, I haven't had time to visit the range yet to try it out.
For Those of us in CA, make sure the muzzle device is not not a flash hider if you want to be CA-compliant. It needs to be a compensator or other device that is CA compliant. It would suck to weld on the wrong device.