So, you decided to add a revolver to your life. That’s great! But how the heck do you use one of these things?
We have answers. Today, we’ll show you how to shoot a revolver, explain the difference between single-action and double-action, and make sure you know how to safely unload your revolver when you’re done shooting.
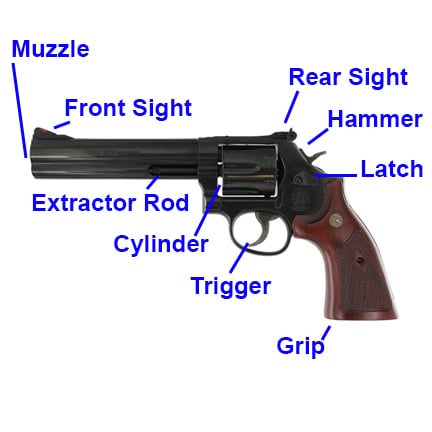
Saddle up, because it’s time to get smart about revolvers!
Table of Contents
Loading…
What You Need Before You Start
Must-Have Tools
- Revolver
- Ammunition
- Ear Pro & Eye Pro
- Targets
Nice to Have Tools
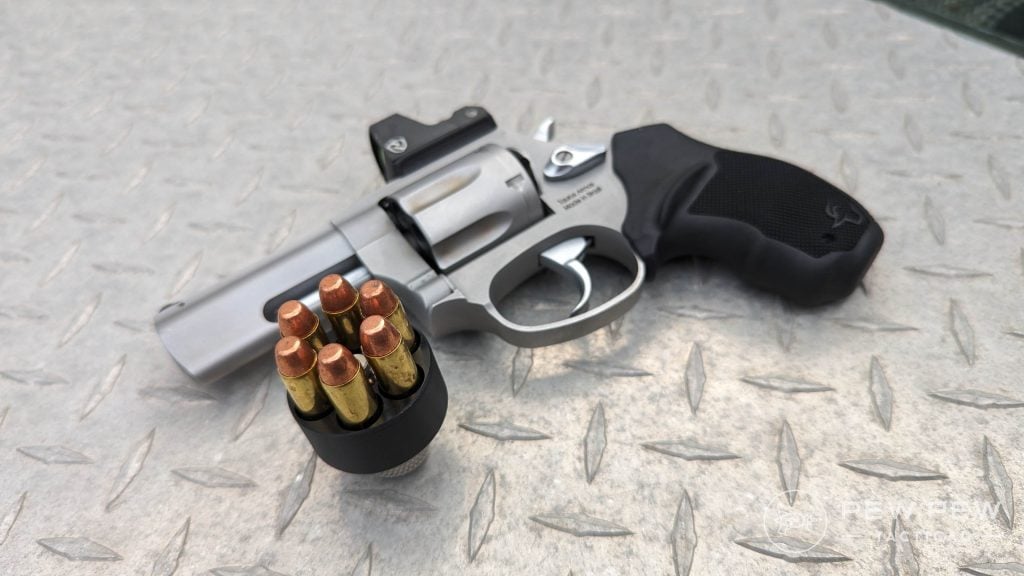
- Speedloader
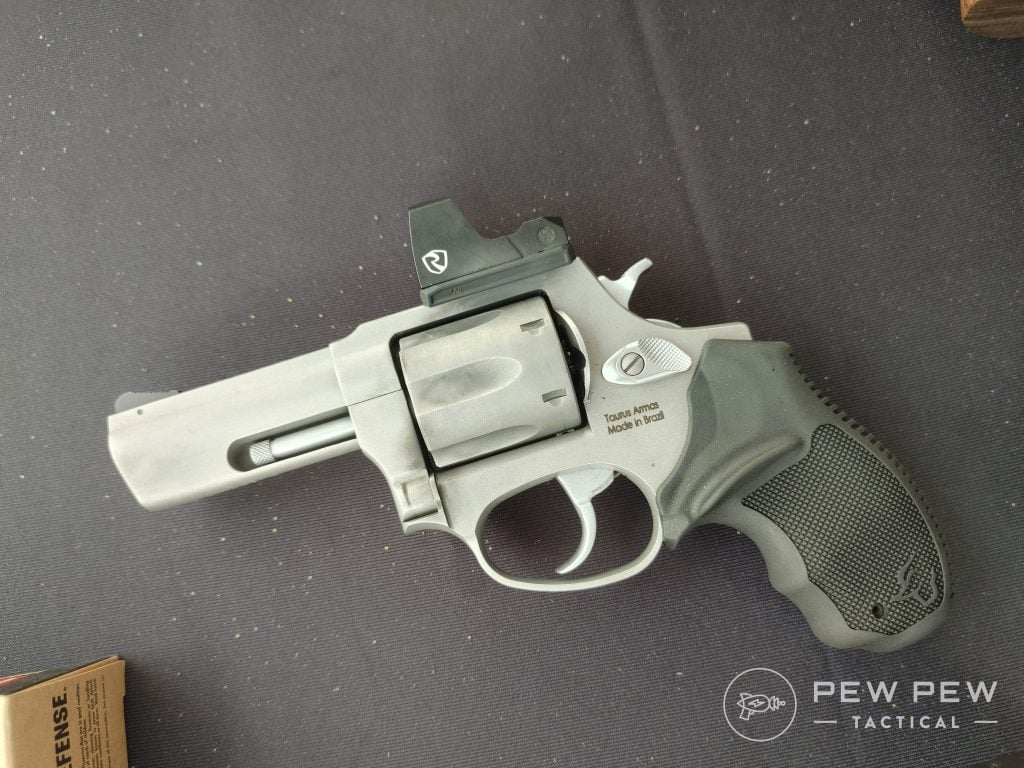
- Red dot/optic (if you’re revolver has a rail)3
How to Load a Single-Action Revolver
Revolvers have been in production for a long time, so there are exceptions to every rule. To be safe, always read and follow your owner’s manual.
Step 1: Open the Loading Gate
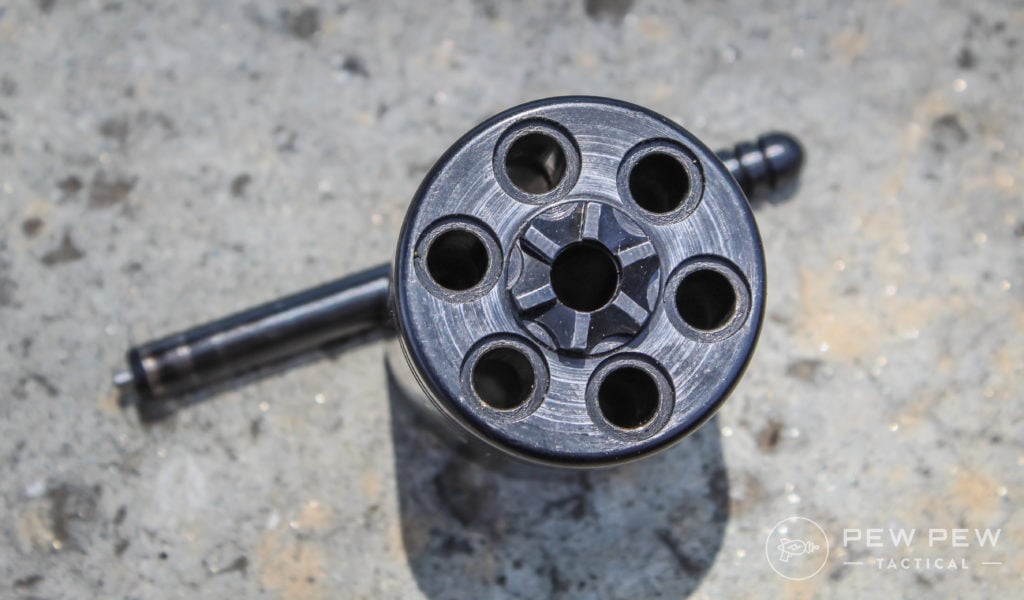
Single-action revolvers typically have a loading gate on the right side of the frame. To load, the loading gate must be swung outward to expose the charge holes/chamber.
Step 2: Insert rounds
Next, you want to place the rounds in the revolver. A single action will only let you insert one round at a time. Rotate the cylinder manually as you go to expose the next charge hole. Note: some models require the hammer to be half-cocked to rotate the cylinder.
Step 3: Close the loading gate
Once you’ve finished placing your rounds, close the loading gate.
How to Unload a Single-Action Revolver
Whether you’ve shot your revolver dry or want to unload your concealed carry gun at the end of the day, the unloading process is the reverse of loading.
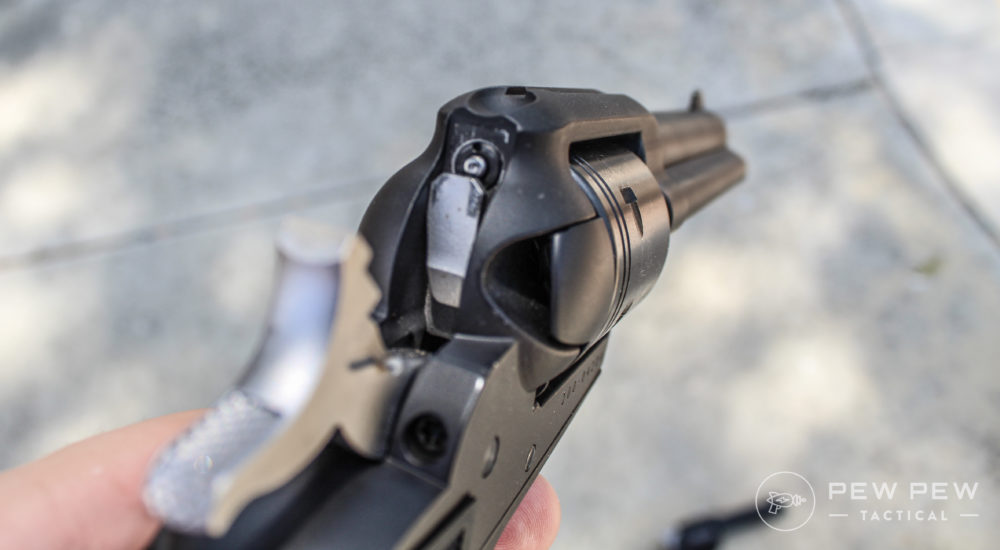
Step 1: Move the hammer to the half-cock position
To unload a single-action revolver, you’ll typically need to move the hammer to the half-cock position. This means that instead of pulling it all the way to the rear, you need to pull back just enough so that it’s about 50% of the way there — a.k.a. half cocked vs. full cocked.
Step 2: Rotate the loading/unloading gate to the open position
Just like before, you’ll need to open the loading gate to access the casings.
Step 3: Eject the rounds
You’ll have to rotate the cylinder by hand and punch out each spent case or unfired round with the ejecting rod.
You might also be able to remove the entire cylinder and dump it out.
Step 4: Close it up
When you’re done, verify that there is no ammunition in the revolver, close the loading gate, and safely lower the hammer if you’ve half-cocked it.
How to Load a Double-Action Revolver
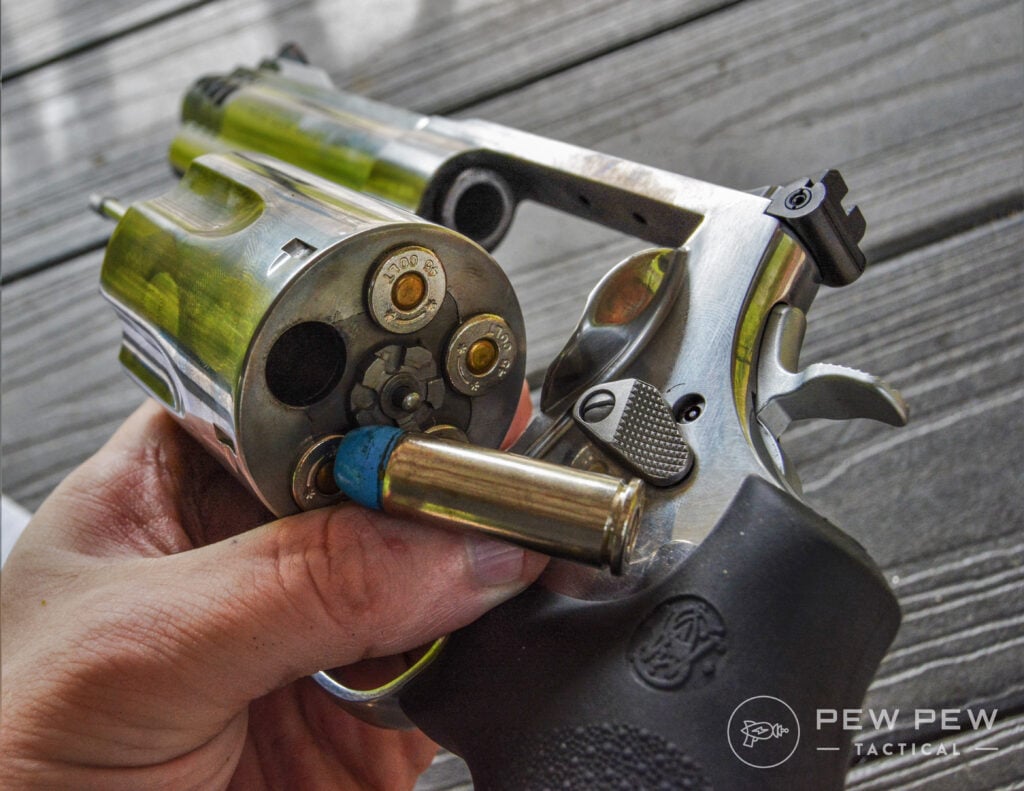
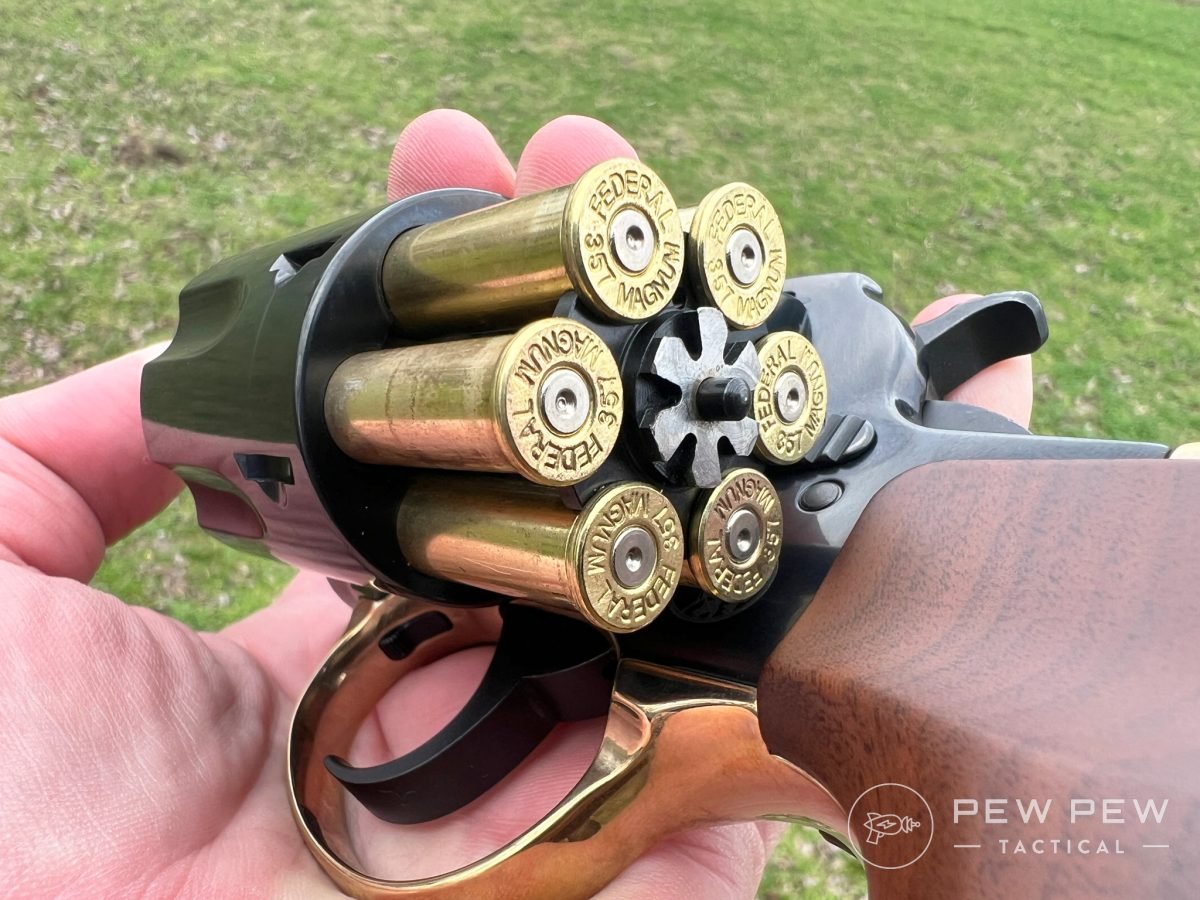
Step 1: Push out the cylinder
The cylinder on a double-action revolver will likely swing out to the left for loading. Push the cylinder latch forward and gently push the cylinder free of the frame.
Step 2: Load the rounds
Unlike the single action, the entire chamber will be visible instead of just one charge hole. You can load each chamber individually or use a speed loader to load them all at once for a quicker reload time.
Step 3: Close the cylinder
Once you’ve loaded your rounds, simply push the cylinder back into the frame until it seats (usually with an audible or tactile click).
How to Unload a Double-Action Revolver
Step 1: Open the Cylinder
To unload a double-action revolver, slide the cylinder latch forward, gently push the cylinder out of the frame (to the left).
Step 2: Press the ejection rod
Gently press the ejecting rod. All the spent brass or live rounds will rise from the cylinder, allowing you to grab them one by one.
You can also do this with the muzzle pointed up for a speed reload, but brass is going to go everywhere.
Step 3: Close the cylinder
When you’re done, make sure there’s no ammunition left in the cylinder and return it to the locked position inside the frame.
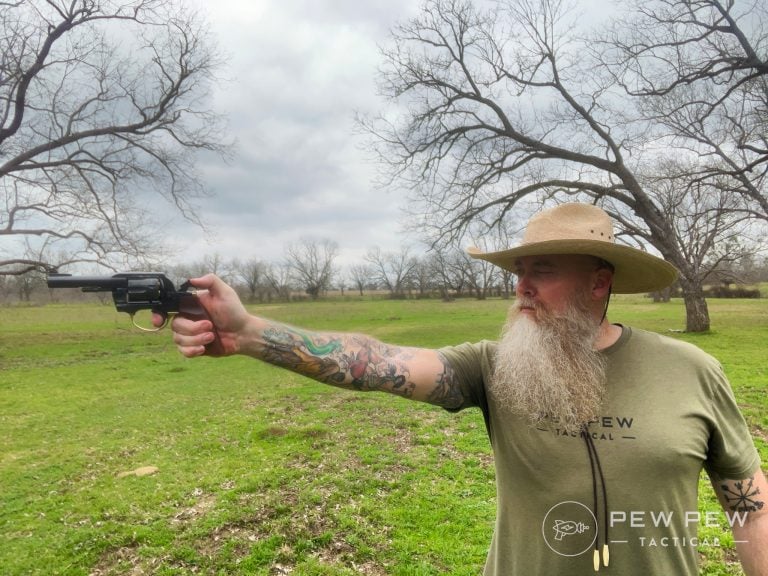
How to Shoot Single-Action Revolvers
Step 1: Get a Proper Grip Angle & Wrist Alignment
We cover the best way to grip and hold a revolver in our article on How to Grip Pistols. Check that out to get the lowdown on how to properly hold a revolver.
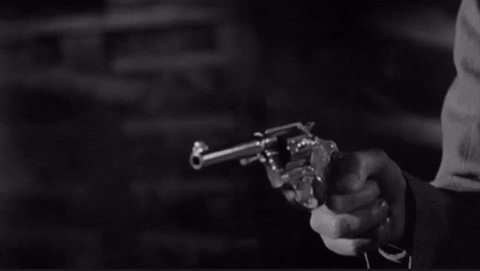
Step 2: Cock the hammer
As the name suggests, the trigger on a single-action revolver only does one job: drop the hammer to fire.
To cock the hammer, use your thumb to pull the hammer to the rear position.
Note: you’ll have to manually cock the hammer each time before firing. This will also cycle the cylinder to line up the next chamber between the hammer and the barrel.
Step 3: Pull the trigger
Since the trigger is simply releasing tension, single-action triggers are famously short, light, and crisp. These are some of the best triggers you’ll ever feel.
How to Shoot Double-Action Revolvers
Step 1: Get the Proper Grip
Like above, you need to get yourself lined up and holding the revolver properly.
Step 2: Pull the trigger
The trigger on a double-action revolver has two jobs — hence the double part.
First, it cocks the hammer so you don’t have to do it with your thumb. As this happens, a mechanism inside the frame rotates the cylinder to tee up the next round.
This time the trigger needs to cock the hammer back as well as drop the hammer. Again, the cylinder will rotate as the hammer retracts. There’s a lot going on inside the revolver when this happens, and you’ll definitely feel a difference.
The trigger pull is a lot longer and heavier compared to a single-action trigger.
Note: Most double-action revolvers will allow you to manually cock the hammer for a single-action shot if you prefer.
Common Mistakes to Avoid
When shooting a revolver there’s a few mistakes you want to avoid…
- Teacupping: Popular in TV shows and movies, but tea cupping (placing your non-dominant hand under the grip) doesn’t help with recoil at all.
- Putting fingers too close to cylinder gap: The cylinder gap is the space between the cylinder and the barrel that releases hot gases and debris when firing. Keep your fingers behind the cylinder gap to avoid range boo boos.
- Skipping reload practice: Practice is boring; we get it; revolvers take time to reload. If you’re carrying one for self-defense, you want to practice your reloads to be as efficient as possible.
- Riding the trigger: Some double-action shooters don’t let the trigger fully reset between shots, which can impact accuracy. Make sure to practice complete, smooth trigger pulls for the best success!
Meet the Experts
This article comes to you from Pew Pew Tactical Founder and CEO Eric Hung. Eric is an NRA-certified pistol instructor and a USPSA, 3-Gun, and NRL22 competitor. He has also researched and written over 250 articles on firearms and gear. He brings this expertise to this article, offering his perspective on how to shoot a revolver.
Editing this article is Scott Murdock. Scott is a Marine Corps veteran who competed and qualified as a rifle and pistol expert while in service. In addition to shooting, Scott has written for a variety of publications, testing, researching, and evaluating guns and gear. He brings that knowledge and skillset to this article, editing and fact-checking for accuracy.
Editor-in-Chief Jacki Billings runs our experienced team of reviewers. She is a National Rifle Association Basic Pistol Instructor as well as a member of the Society of Professional Journalists, ACES: Society for Editing, and the Professional Outdoor Media Association. Jacki has a bachelor’s degree in journalism and has worked as a media professional for close to 20 years, specializing in gun media for almost 10 years. With 2,000+ articles to her name, she uses her professional journalism and editing experience to set testing protocols and editorial standards for Pew Pew Tactical.
Final Thoughts
As usual, my advice is the same: find a reputable course near you to learn more and practice regularly to learn how to shoot a revolver well.
In the meantime, we have an online resource for you! Check out our Beginner Handgun Course that goes through all the basics with none of the attitude. When you hit the range for the first time, you’ll have a solid foundation to build on.
What are you planning on buying as your first revolver? Let us know in the comments. Need some help deciding? Check out our guide to Revolver Calibers, or to get your very own, check out our guide to the Best Beginner Revolvers!
Latest Updates
April 2025: Updated instructional content and added supporting media.


1 Leave a Reply
Simple, no index finger forward; not all cylinder/forcing cone gaps are created equal. This bark bites.